So, the essence of the method lies in the special arrangement of the beds, aimed at providing the plants planted on it with a supply of water, which will be consumed gradually.
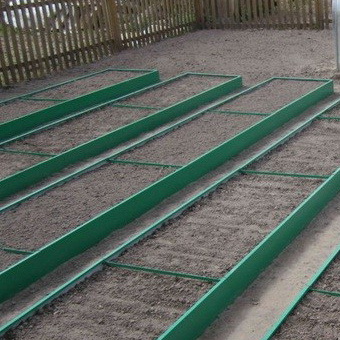
The methodology is the following. First, a trench is being prepared for the future bed. Its length can be arbitrary, the main thing is that one end looks strictly to the East, and the other to the West. Width - 40 cm; depth - 45-50 cm.
A clay castle is made along the bottom of the trench along its entire length, which will help retain moisture, preventing it from seeping into the deeper layers of the soil. the castle should have a slight slope for the drainage of irrigation water. It is useless to arrange a slope even when digging a trench.
Such a castle is made simply - clay is laid out at the bottom, which is tamped with the help of special devices. The thickness of the compacted layer of clay should reach 15 cm.
On top of the castle, drainage is arranged from a mixture of brushwood, large pebbles and broken bricks. The thickness of the drainage layer is 10cm.
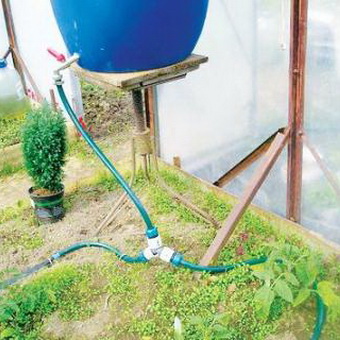
In the upper part of the trench, which is formed due to the inclined lock, a so-called well is arranged. More precisely, this is an ordinary bucket from which the bottom has been removed. It is installed on brick halves laid on the bottom of the prepared ditch and thus buried in the ground. His first task is to supply water to the bed on clay, i.e. from below. The second is so that you do not think of watering the bed with a hose and eroding it from above, violating the permeability of the earth and the moisture retention system.
The lower end of the ditch is equipped with a vertically installed piece of ordinary pipe. Its purpose is to control the degree of filling of the irrigation trench. When there is enough water, water will begin to pour out of it.
Now it remains only to fill the trench with fertile soil and the bed will be ready. Considering the conditions for future irrigation, it is best to use soil of the following composition for such a bed: one third of a bucket of high-quality humus and a glass of wood ash are added to a bucket of soddy soil.
The depth of the beds, thus, is about 20 cm, which will be quite enough for the full development of such common garden crops as cucumbers, tomatoes, cabbage and many others.
You don't have to make a new garden bed every year. It will be enough only to replenish the depleting fertile layer in a timely manner and then it will last for several years.
Irrigation technology is extremely simple. The hose through which water is supplied is lowered into the "well". In this case, the gardener is only required to ensure that the bed is not flooded, for which a rod is lowered into the pipe at the opposite end, along which the water level is controlled.
In order to improve the moisture conservation of such a bed, you can do the following: plant seedlings of plants in the country, then mulch the soil with moss. Water is still not supplied through the surface of the bed, so this will not affect the quality of moisture, but the evaporation of moisture will noticeably decrease, as a result of which the maximum possible break between waterings will increase. And their number will decrease.
Using this technique, you can organize watering with your own hands in a garden of any size, with soil of any type. It proved to be especially effective in areas with sandy soil, the owners of which, for obvious reasons, always experience problems with the timely irrigation of the site.
I think now it’s clear how to organize watering plants in the garden or how to do watering in the country with your own hands. An additional advantage of such a water supply system is that only the soil of the bed is moistened, and not the whole earth around, as is often the case. So the use of this technique, among other things, also allows you to significantly save water, which is also important, especially in dry areas.
Homemade drip irrigation of the garden with your own hands
One of the main problems of a summer resident who has planted a garden is the inability to visit his country lands every day or at least once every 2-3 days. This is only possible on weekends. Hence the irregular watering of the beds and, as a result, frail stunted plants, a low yield of small tasteless fruits. Is it possible to somehow solve this problem? It turns out that there is a way out, and not even one, but several options for getting out of such situations at once.
The Golden Rule of Watering
First of all, you need to learn the main rule of watering - do not use cold water. Many neglect this condition, supplying water to the beds directly from the water supply or artesian well. With such watering, young plants are exposed to temperature stress, due to which their development noticeably slows down.
Accordingly, if the growth process deviates from the norm, crops need additional nutrition and more abundant watering to restore vitality. Thus, if you organize watering correctly, you can avoid the need to do it too often.
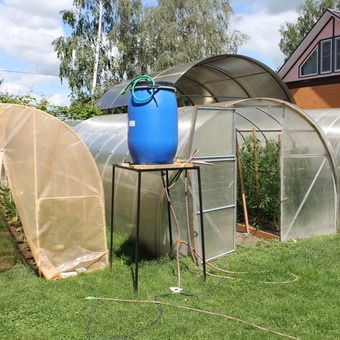
How to make homemade drip irrigation of the garden with your own hands? Everything is very simple. It is enough to install a barrel on the site. If you fill it in the evening, then during a warm summer night the water will warm up to a temperature acceptable for irrigation, so in the morning, before the sun starts to bake, you can get down to business.
By the way, going home at the end of the weekend, you can put cut grass and weeds left after weeding in a barrel of water. In a week, under the influence of sunlight, such an infusion will certainly ferment, reborn into a nutritious liquid, which can successfully replace most dressings based on mineral fertilizers.
How to organize watering a garden from a barrel?
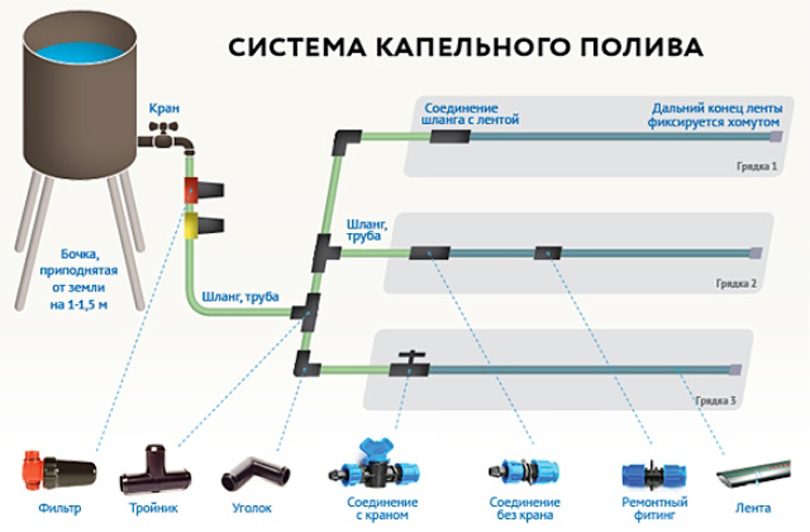
Don’t worry, you won’t have to draw water from a barrel with buckets and carry it to the garden. There are more rational ways to organize irrigation. For example, drip irrigation. This method was invented in ancient Egypt, where, as you know, the problem of irrigation is very acute. However, despite its venerable age, this technology has not lost its relevance to this day.
The essence of drip irrigation is that water is supplied to plants not periodically and in large volumes, but constantly, but a little bit, literally, drop by drop. To make the simplest device with your own hands for organizing such irrigation is quite within the power of any summer resident.
To do this, one or more faucets are installed in the lower part of the barrel for warming water, which was mentioned above - the number depends on the area of \u200b\u200bthe garden, the spread of beds around the site and their location relative to the installation site of the barrel.
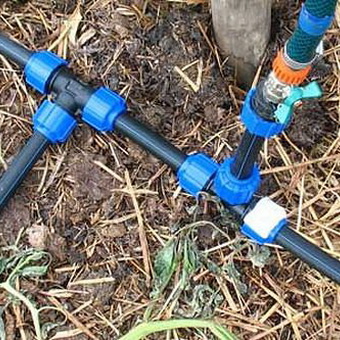
Thin plastic hoses are attached to the taps, which you can buy at any hardware store. Their opposite end is securely clogged with plugs so that water does not seep through them. The aquifers prepared in this way are stretched along the beds, trying to lay them as close as possible to the base of the seedlings.
Then, using a thick clamp needle, small holes are made in the hose - you need them to be opposite the roots of the plants. After that, you can open the taps.
If you use a standard metal barrel with a capacity of 250 liters as the main container, then this volume of liquid is quite enough for drip irrigation of 6 acres for 5 days.
The secret of watering garden and ornamental trees
It has long been known that trees receive nutrition not only in the form of liquid absorbed by the roots from the soil. They also do this through the foliage, through photosynthesis - a special process of converting sunlight into the life energy of plants.
At the same time, the dust that settles on the leaves during the summer prevents this phenomenon, reducing the activity of photosynthesis. Therefore, it is very useful to periodically not only supply water to the root circle of the tree, but also spray its crown. This technique is especially effective in relation to coniferous ornamental plants.
Mulching is a sure way to keep moisture in the soil.
Experienced gardeners know the benefits of loosening. The fact is that from dense soil, water rises through microcapillaries to the surface, from where it evaporates very quickly.
When loosening, microcapillaries are destroyed. However, the effect of such a procedure is short-lived, so it has to be repeated at least 3 times a week. That is, again, everything depends on the impossibility of too frequent visits to the dacha.
You can painlessly reduce the amount of loosening by mulching. The essence of this technique is that after watering the soil is loosened, and then sprinkled with mulch - a mass of large sawdust, grass chips, the same weeds.
The thickness of the protective layer should not exceed 4-5 cm, otherwise it will become an excellent breeding ground for pests. It is best to use a mulch made from pine sawdust or bark - they not only retain moisture perfectly, but also help to clean the beds from slugs. But hardwoods are not suitable for this, because under them the earth begins to rot.
You can replace mulch with white non-woven material. Just don't put it directly on the plants. To do this, install wire arcs over the beds. This will improve ventilation. And remember that it is strictly forbidden to use ordinary plastic wrap for these purposes.
Perhaps, it is possible to appreciate all the advantages of automatic watering only after its installation. Personally, it seemed to me that it was easy and pleasant to follow the water flowing from the hose. Probably, this is heredity: my great-grandfather carried water to the garden in buckets from the Aksai River and did not dream of anything else.
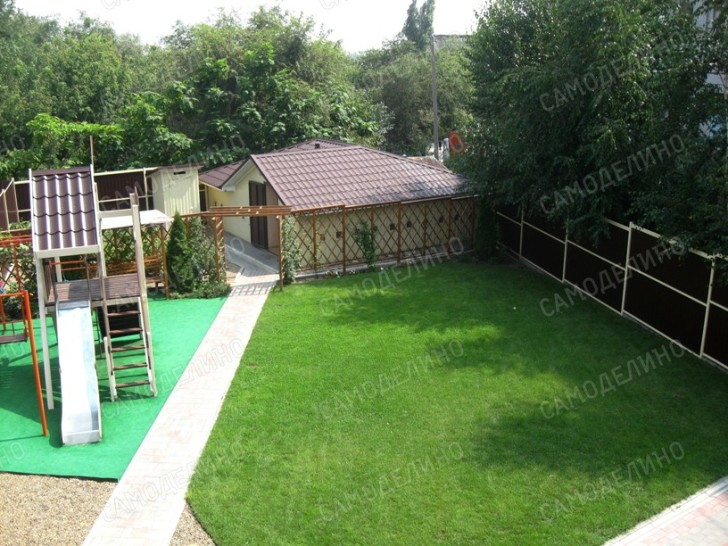 Lawn, garden (behind the trellis) and trees behind the fence, which we will water
 Irrigation types and practical solutions
It just so happens that we all have different needs, preferences and opportunities in organizing irrigation on our own plot. So, it is necessary to consider various options so that everyone can choose their own. At the same time, it will not work to create automatic watering on the site with our own hands, if we do not get acquainted with the subject of automation, that is, with the design of ordinary irrigation. Then we will consider the organization of an automatic watering system for a garden, flower garden and lawn using a specific example.
Of course, you can draw dozens of options for schemes, but we will simplify the task and divide the irrigation system into three functional components, by combining which you can create your own unique one. It's very simple, any plant moisture supply system consists of three parts, namely:
- water source;
- plumbing;
- elements of water supply to plants.
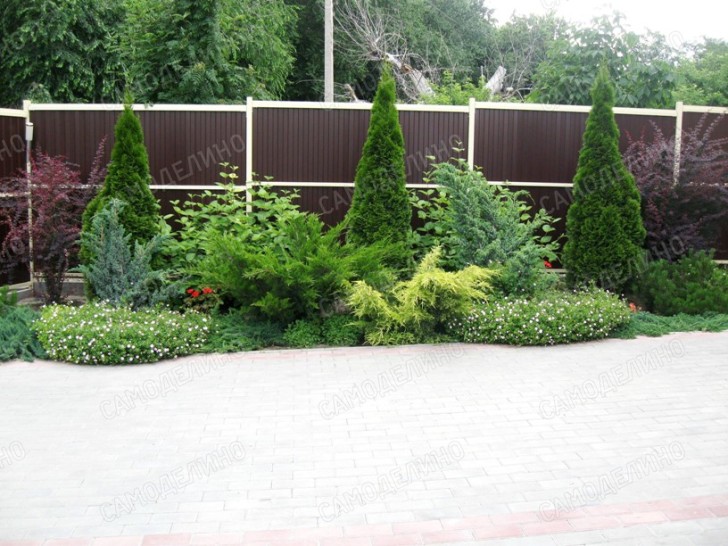 The flower garden in the yard is also subject to automatic watering
 "Without water and neither here nor there"
So they sang in the Soviet film and it is impossible to refute it. Water sources can be:
- central water supply, in which there is always water (almost);
- water supply of a dacha society, in which water is supplied according to time;
- well or well;
- pond, lake, river, that is, a natural reservoir;
- a container with accumulations of rainfall, drainage water or filled from a water pipe.
Everyone likes clean and warm water
Water - it is water: it would seem, what's the difference? Differences in its purity, volume, temperature and pressure.
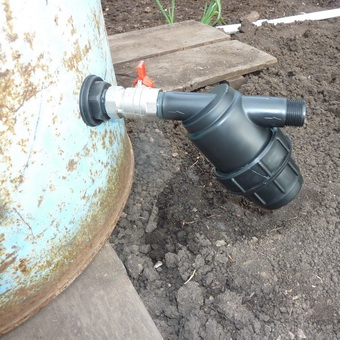
In the case when we are dealing with not quite clean water, that is, from a reservoir or container, and we use drip irrigation, you will have to install a special filter. Otherwise, the droppers will quickly become clogged.
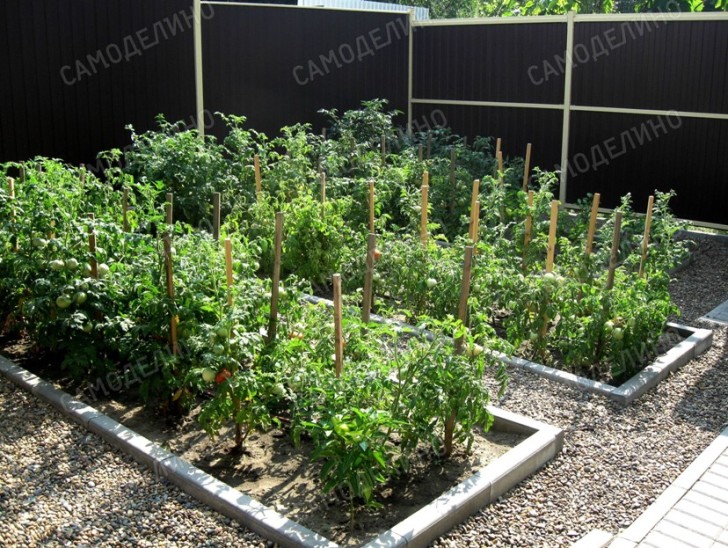 The vegetable garden wants personal irrigation warm water
 Temperature is also important: many plants do not like cool water. Source cold water- well or well. The problem is solved by natural heating of water in the storage tank. Note that when irrigating at night, the temperature difference between the liquid and plants is noticeably smaller, so this positive factor can be used. Also, when spraying water with small drops, it has time to warm up when in contact with air. This circumstance must be taken into account.
It is desirable to have more water and stronger pressure
Water pressure has ambiguous properties. For example, when using drip irrigation, it should not exceed two atmospheres. Too high pressure is compensated by installing a reducer. On the contrary, when using sprinklers (sprayers) with a retractable part, a water pressure in the system of the order of two atmospheres will be required. You can raise the pressure with an additional pump.
The amount of water supply is also ambiguous. So, when using drip irrigation from a container, the size of the latter determines the duration of irrigation. If the correct amount of liquid is prepared, the process will end at the right moment, and we will have the simplest automatic system. On the contrary, when installing sprayers, for their normal operation, it will be necessary to measure the water consumption and the number of the latter with the capabilities of the water supply. In the worst case, the sprinklers simply won't work or won't cover the given area.
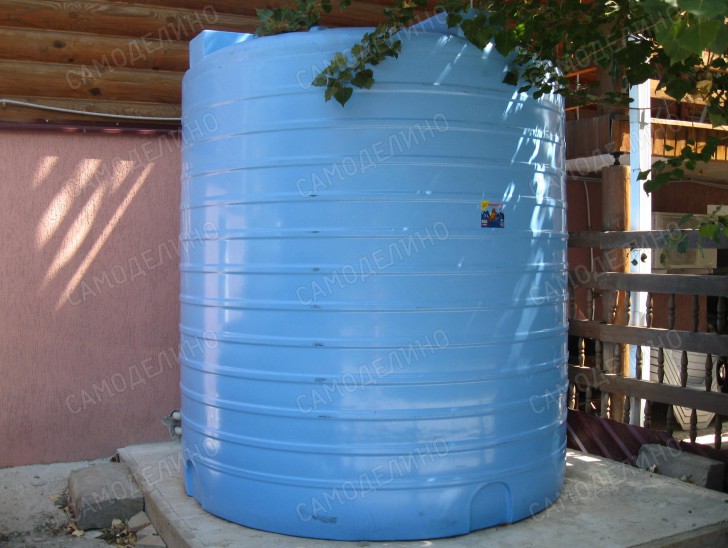 This capacity will last for a long time, but you need a pump to supply water
 Technical solutions for water supply
All options with no plumbing provide for the use of a pumping station or just a pump. A pumping station will provide constant water pressure to the system, but costs money and requires maintenance. It is cheaper to install an ordinary, for example, a drainage or submersible pump and pump water into a container. By the way, the water in the tank will warm up.
The process of turning the pump on and off can be automated with your own hands. To do this, a valve float from an ordinary toilet bowl is installed on the container. The float can control the limit switch. The pump is connected to the switch via a timer. Otherwise, the bounce of the switch contacts will disable the pump.
When filling the container from the country water supply, you can install the mentioned valve from the toilet bowl to the supply line. Thus, the container will be filled with water automatically to the required level during your absence.
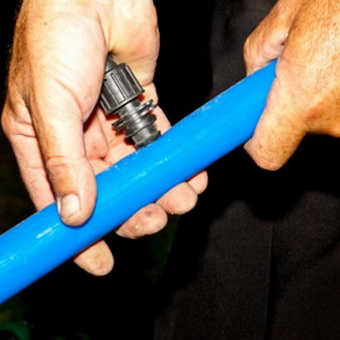
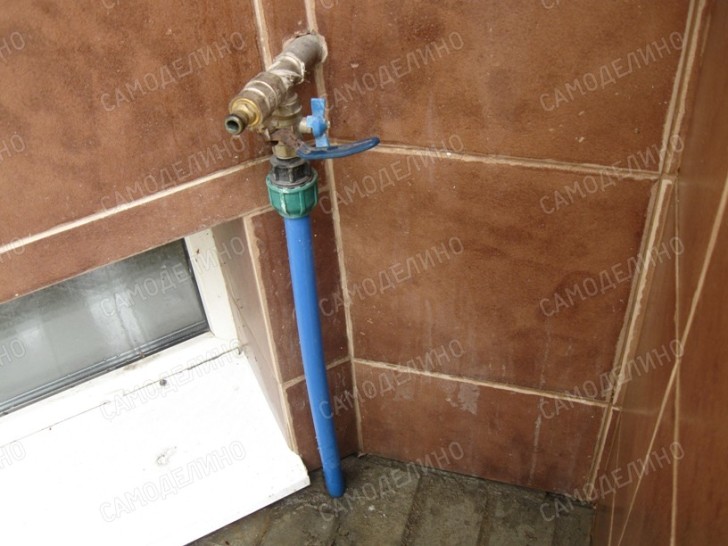 Irrigation is connected to the home water supply through a separate tap with a HDPE 25 pipe
 Plumbing is no longer the same
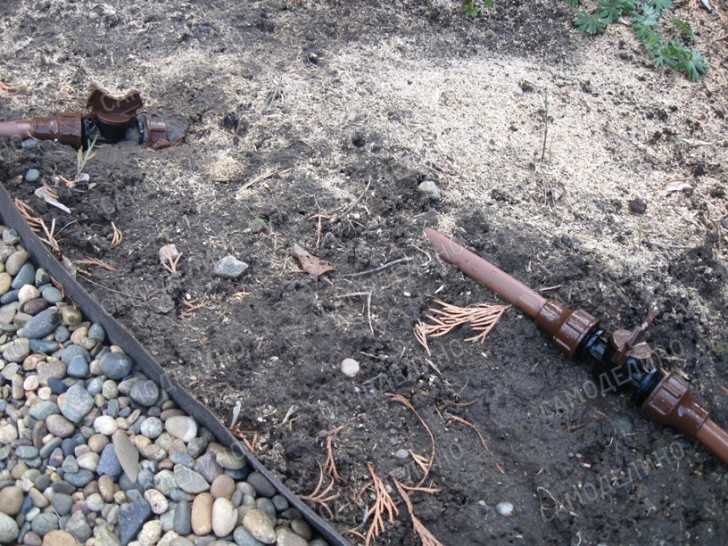
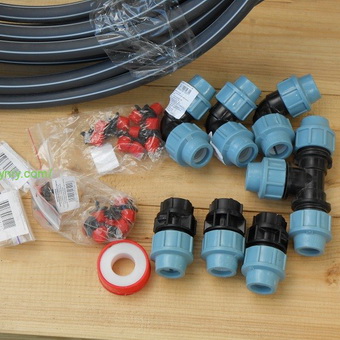
When organizing water supply in the country, plastic pipes gradually replaced metal ones. Probably, this event is comparable to the replacement of wired phones with mobile phones. Such pipes can be delivered to the site in the trunk of a car, mounted without welding or threading, that is, using plastic fittings. Now the plumbing does not rust and can withstand the freezing of water.
The most popular HDPE pipes. For a plot of 6-15 acres, pipes with a diameter of 25-40mm are sufficient. It is important to hide the pipes in the ground so as not to trip over them and not spoil the view of the site. The minimum laying depth is 0.3 m, so as not to damage it with a shovel. At a depth of 1m, they will be protected from freezing.
Variety of elements for delivering water to plants
Water reaches the plants with a hose, sprinkler, drip irrigation method or root watering method. All options have the right to life and are applied depending on specific conditions.
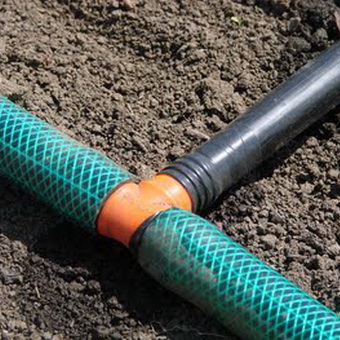
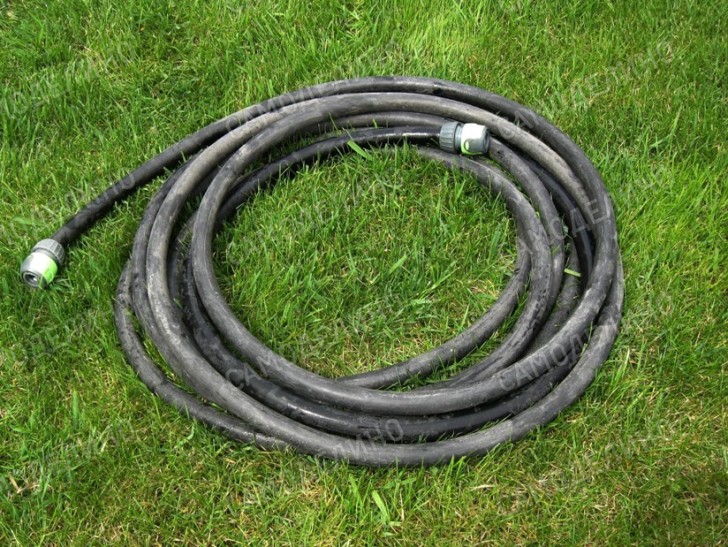 Hose with quick couplings - a handy tool for watering
 Good old watering hoses
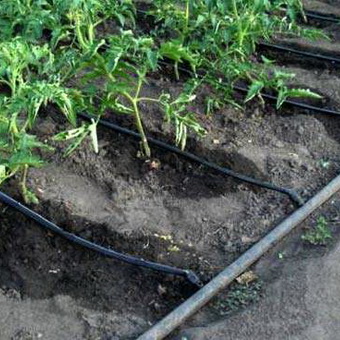
Popular economical drip irrigation
Option number 2 - drip irrigation. If the water source is a container, such a system will be automatic: water runs out - watering ends. When powered by a water supply, a pressure reducer is required. For automation, a timer with a valve is required. Of course, there is no getting away from plumbing, faucets and drip tape (or droppers). If water is supplied by a pump, then a pump is also needed. Drip irrigation is very popular and provides minimal water consumption. Good for irrigating vegetables and plants in greenhouses. With your own hands, you can make calibrated holes in the hose and get the simplest drip irrigation. Details about drip irrigation:,
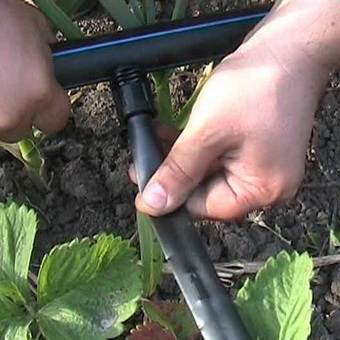
Super Economic Root Irrigation
Option number 3 - subsurface irrigation. This type of irrigation is used in conditions of water austerity. Near the root system, sections of thick pipes with drainage are installed, where water is supplied. In this case, not a single drop of water will be wasted, and the soil will remain loose. This method is used to supply water to grapes and trees.
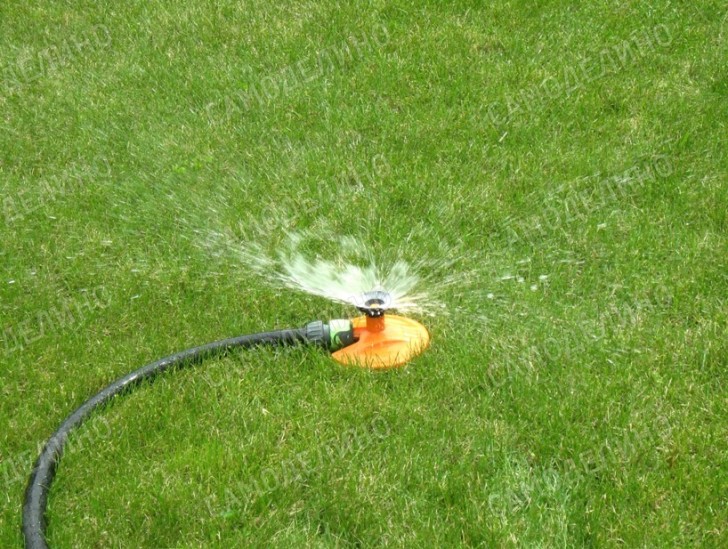 Such a sprayer covers a different area depending on the position of the faucet handle.
 artificial rain
Master class on organizing automatic watering with your own hands
We now know enough about watering per se to automate it. Personally, I did not have a clear understanding of the need for such a system at the stage of building a house. However, laying the pipeline system before the arrangement of the paths was enough ingenuity. Since we cannot do without it, we will start with this.
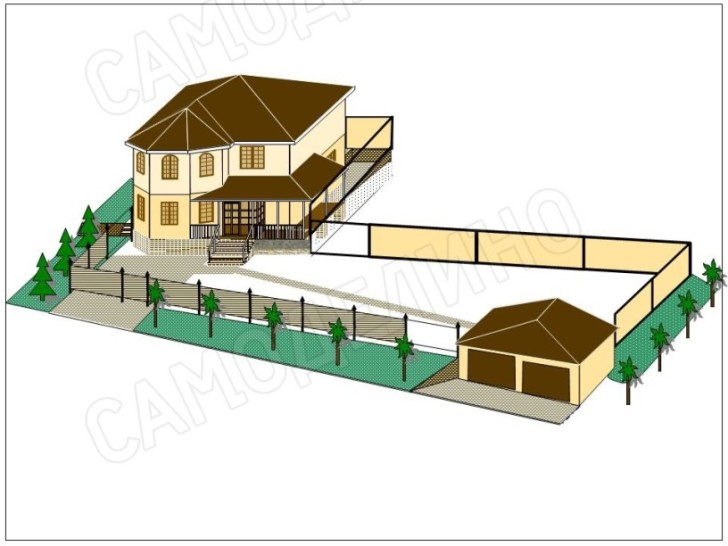 Sketch of the area that we will provide with an irrigation system
 Plumbing scheme for irrigation from hoses
The irrigation system consists of a large number of components, so it will be difficult to correctly place all the elements and calculate the necessary materials without a diagram. It is better to do this on a computer using a publicly available program. I worked in Microsoft Power Point. The sketch can also be done on paper. You will need a compass, pencil, eraser and ruler. Of course, it is necessary to take the dimensions of the site and transfer it to the sketch in scale.
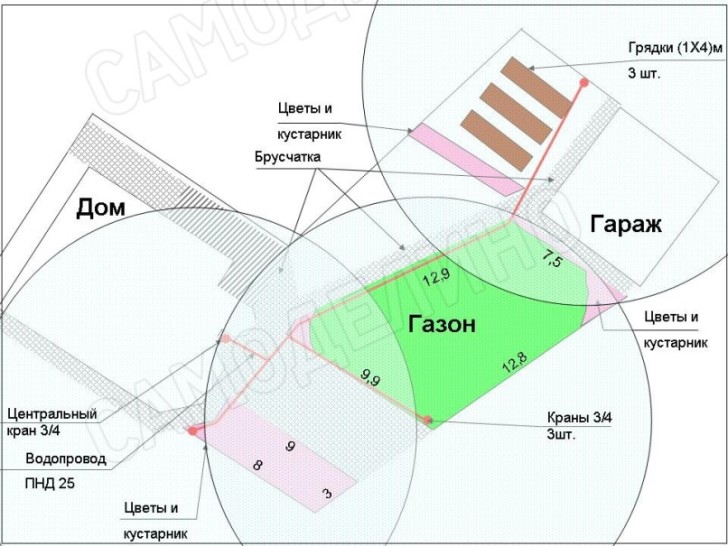 Plumbing scheme for watering from a hose
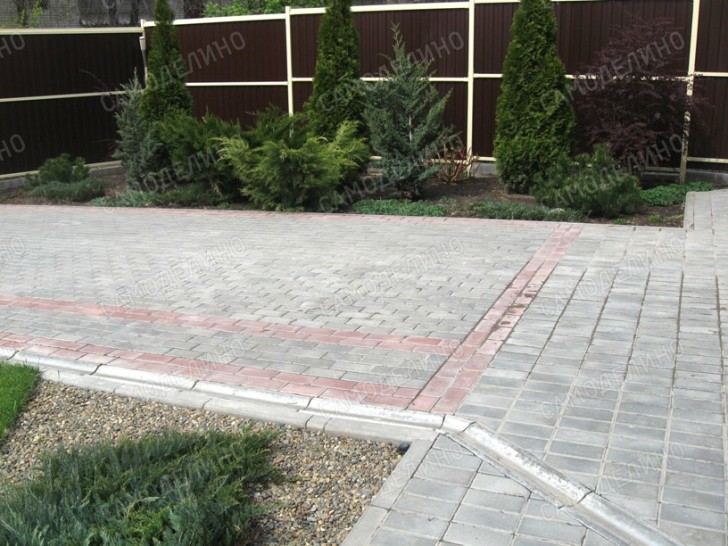
 Prior to the arrangement of paving stones, a water pipe was laid from HDPE pipes with a diameter of 25 mm, which is indicated in red on the diagram. The numbers in the drawing indicate the dimensions of the sides of the areas for irrigation. Circles with a radius of 10 m centered at the locations of the cranes demonstrate the possibility of irrigating all vegetation on the site and trees behind the fence.
All connections are made with plastic fittings. It is a pleasure to work with them: docking is fast, simple, reliable. The pipe was laid to a depth of more than 0.5 m, so as not to damage it with a shovel. I tried to carry out laying outside the tracks to ensure the possibility of repair and connection additional lines, if necessary.
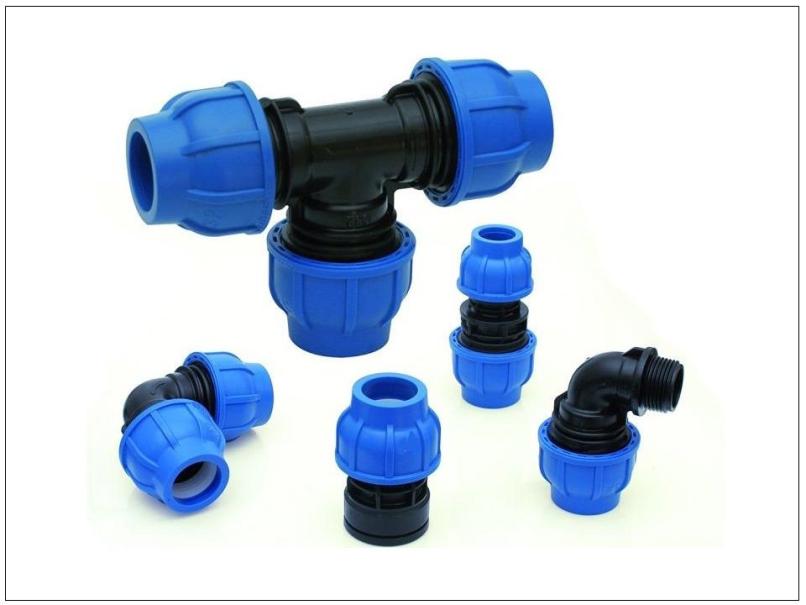 Plastic fittings provide fast and reliable connection of HDPE pipes
 Three taps with fittings are installed at the end points of the water supply, this was done for a quick-connect hose connection. The site has a noticeable slope, which means that the pipe also lies with a slope. This makes it easy to remove water from the system in the fall. On a flat area, it is quite possible to lay water pipes with a gradual increase in depth from one side of the site to the other.
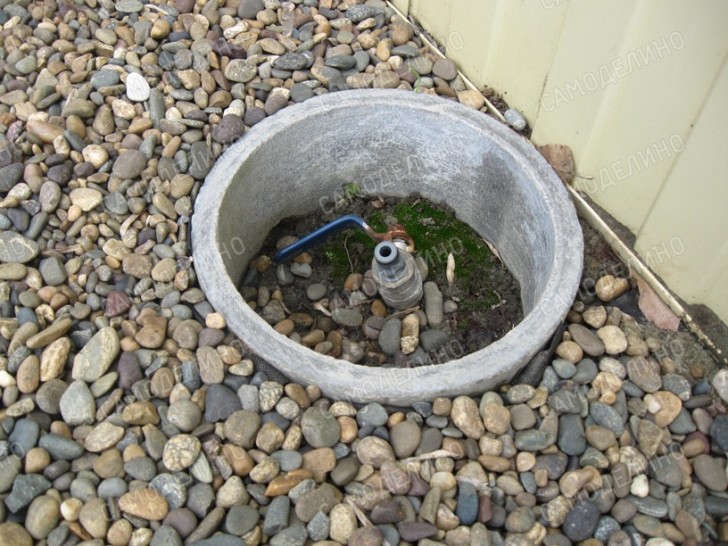 Hose connection point with tap and quick coupling
 Needs and possibilities of automatic irrigation
Subsequently, along with the desire to go on vacation and forget about watering, there was an understanding that a flower garden, lawn, vegetable garden and trees - all of them must be provided with water in different modes.
It was decided that water would continue to be delivered to the trees by means of a hose, as this is rare, it is necessary to control the filling of the holes, and it is expensive to supply water to them. 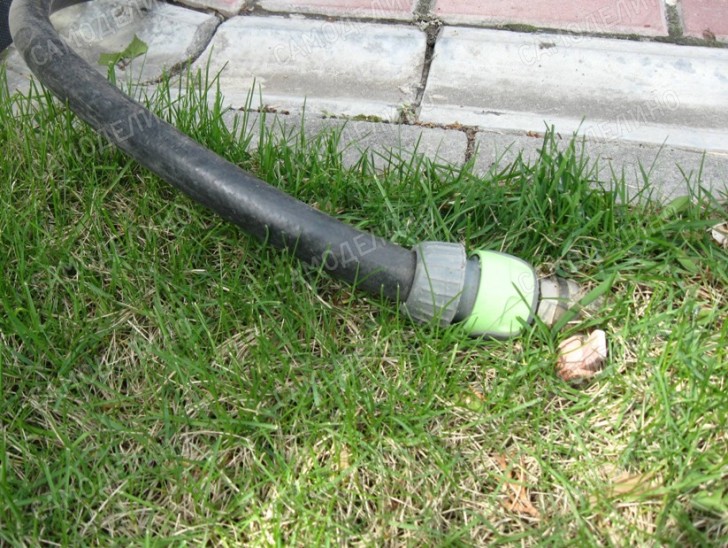 The hose for watering the trees is connected to a faucet on the lawn that does not interfere with the lawnmower
Designing the actual irrigation system begins with an assessment of water consumption. That is, the possibilities of plumbing must meet the needs of sprayers. To this end, you need to put a bucket of 10 liters in the bath, fully open the tap and record the time of its filling. I got 25 seconds, which corresponds to the consumption of 1.4 m3 of water per hour. When installing the water supply in the house, it turned out that the pressure in the system was about 2.5 atmospheres.
Choosing nozzles for different irrigation zones
Now we choose sprayers. Informed people suggested that one should pay attention to Rain Bird products, as they are widely represented in Russia and have a good price-quality ratio. Complex atomizers are not cheap, so there is a desire to get by with a minimum amount. At the same time, the following parameters of sprinklers must meet the needs of the system: operating pressure, water flow, irrigation radius.
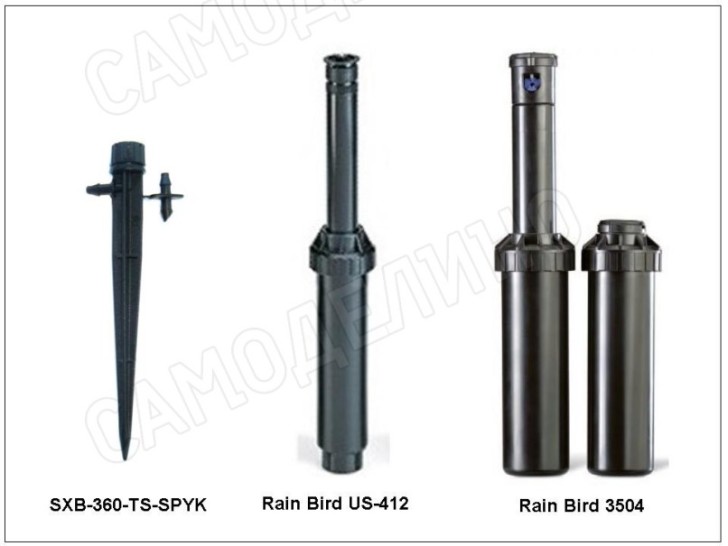 These sprinklers are selected for automatic irrigation
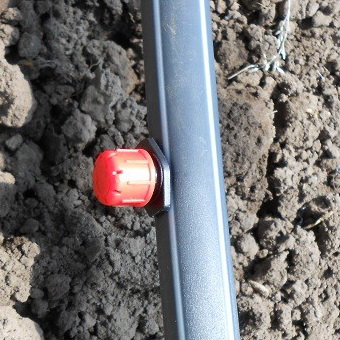
 As a result, SXB-360-TS-SPYK micro-sprayers were chosen to irrigate the beds. They have a spray sector in the form of a circle with a maximum diameter of 5m. The size of the working area is easily adjusted by rotating the head of the device, which means that I can set it up for a bed 1.2m wide and a flower garden area 0.6m wide. The manufacturer does not specify the water flow rate, but the fact that it is connected with a distribution tube for drip irrigation outlets means that I can install dozens of such sprayers in one irrigation zone.
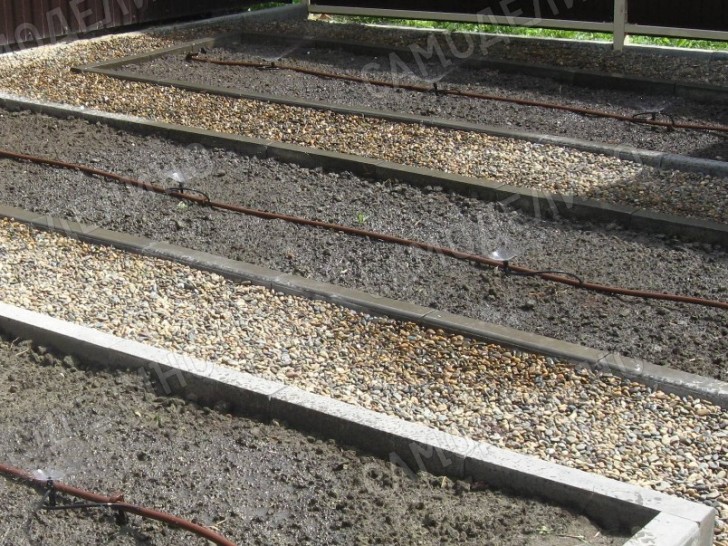 Sprayers in the garden at work
 A US-412 sprinkler was chosen to irrigate a 3m wide flower garden (near the fence). Its working pressure of 1.0-2.1 bar corresponds to the parameters of the existing water supply. (Note, 1bar corresponds to 1atm with a slight difference.) The device has a spray radius of 2.7-3.7m, which is consistent with the size of the flower bed. The US-412 water flow parameters are 0.1-1.21 m3/h, which means that I can include several of these sprayers at the same time in a system with a flow rate of 1.4 m3/h. The device has an adjustable irrigation sector, that is, I can set it up for irrigation in the corners with a 90 degree setting and on the side of the flower bed with an angle of 180 degrees. The sprayer has a retractable stem that hides up to the level of the soil from the feet of others.
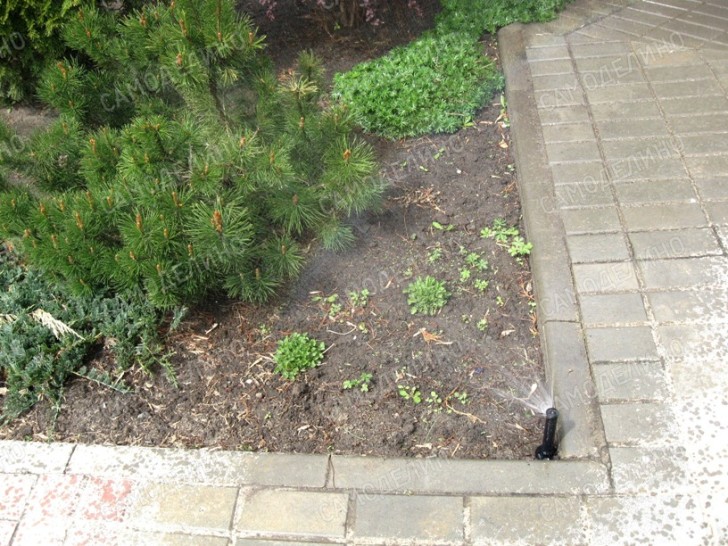 Sprinkler is set to water the corner of the flower garden
 On the example of a flower garden, it became clear that the water consumption of sprayers has a value comparable to the capabilities of a water supply system. That is, automatic watering of the lawn can only be provided by more complex and expensive rotary sprinklers. Devices of this kind do not pour out water in a sector, but in a jet, which sequentially irrigates a given sector when the spray head rotates. As a result, the range of spraying water increases, and the water consumption decreases. Of course, the irrigation time increases. The Rain Bird 3504 rotor has an irrigation radius of 4.6 - 10.7m, which matches the size of the green carpet. Water consumption of 0.12-1.04 m3/hour allows you to install up to 10 such devices. The working pressure of 1.7-3.8 bar also suits me. The retractable part of the device will hide in the grass after closing the solenoid valve. Creating a do-it-yourself lawn irrigation system, I settled on Rain Bird 3504 rotary sprayers.
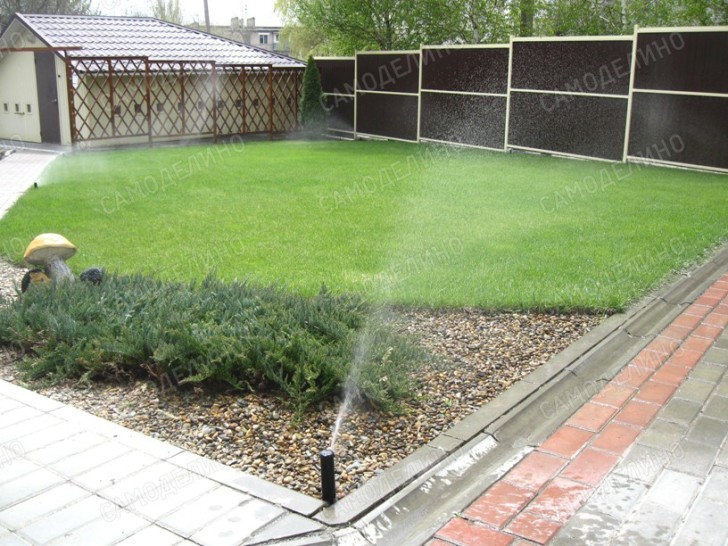 The Rain Bird 3504 rotor goes out of its way and hits the tracks
 Autowatering without a sketch is difficult to design
Now almost everything is clear, but again we need a drawing. So, we will repeat it, excluding the previously depicted elements for better readability.
The green circles in the diagram indicate the locations of the valves to control the inclusion of water. To implement an automatic irrigation system on the lawn, two valves are placed in a common box: for supplying water to the grass cover and for supplying water to beds with a flower bed near the trellises. To connect the valves to the controller, which is planned to be placed in the garage, a cable is provided, indicated in the diagram with a black dashed line. The blue color shows a pipeline made of HDPE pipe with a diameter of 25 mm, connecting the valves with the previously laid pipeline and sprinklers. Turquoise shows a 17mm diameter pipe connecting 14 SXB-360-TS-SPYK nozzles to the corresponding valve.
 Scheme of automatic watering of the lawn, flower garden and vegetable garden
 As a result, 6 US-412 sprinklers were placed in the flower bed area at the fence to cover the entire area. The automatic lawn irrigation system is provided by six Rain Bird 3504 rotors. They have a minimum irrigation radius of 5m, which guarantees coverage of the entire area of the site with minimal water pressure. The drawing shows that the entire area of lawn grass irrigation overlaps at least twice. This approach ensures that the entire area is irrigated when using rotary sprinklers.
Sprayers SXB-360-TS-SPYK have a different diameter of irrigation in the diagram, which provides for their adjustment. Two micro-irrigation taps allow you to additionally control the irrigation zones of 14 sprinklers.
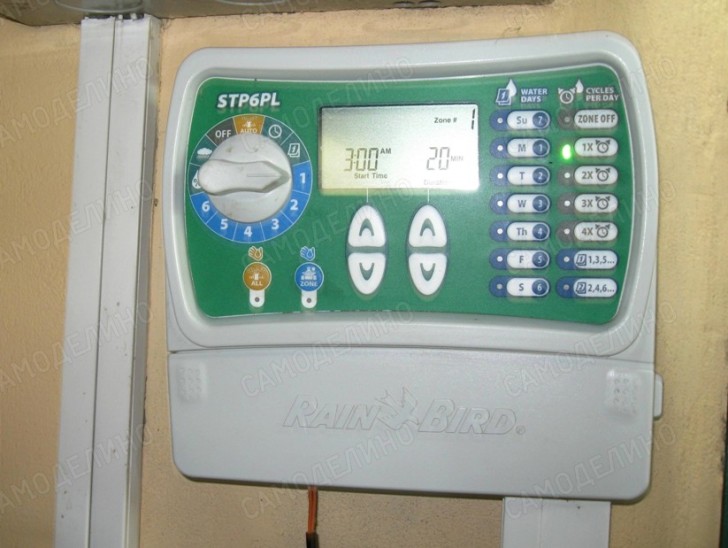 Irrigation controller conveniently placed on the garage wall
 Installation of an automatic watering system
Now that we have an irrigation scheme, we can completely determine the list and number of components needed for practical installation. The following list came up:
| Name | Quantity | Purpose |
|---|---|---|
| STP6PL controller | 1 PC. | For control of solenoid valves |
| Atomizer UniS-400 (With nozzle - UniS - 412) | 6 pcs. | For watering a flower garden, complete with nozzle 12 VAN |
| Nozzle 12 VAN | 6 pcs. | For watering a flower garden, complete with UniS-400 sprayer |
| Rotary Sprayer 3504 | 6 pcs. | For lawn watering |
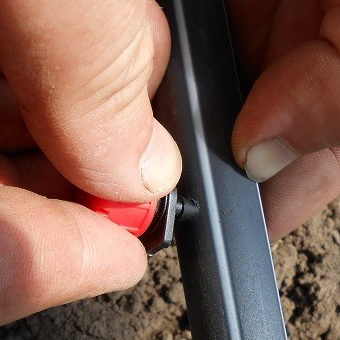
| Spray gun SXB-360-TS-SPYK with self-piercing fitting included | 14pcs | For watering beds and a narrow flower garden near the pergola |
| SPX-FLEX Elbow Pipe | For connecting lawn and flower garden sprayers using flexible bends (as an option) | |
| Union threaded angle SBE-050 1/2" | For connection to 25mm HDPE pipe of UniS-412 atomizers and 3504 rotors | |
| Solenoid valve 100-JTV 1" | 2 pcs. | For supplying water to lawn and flower bed sprayers |
| Starter kit XCZ-075 PRF, 1" | 1 PC. | Valve with filter for supplying water to bed sprayers |
| Drip irrigation hose 17mm | 30m | For supplying water to bed sprayers |
| Rack holder 12-16 mm C12 | 15pcs | For fixing to the ground pipe 17mm |
| Distribution tube 4-6mm XQ1000 | 7m | For connecting SXB-360-TS-SPYK atomizers to a 17mm pipe |
| Union tee XFD TEE | 1 PC. | For piping 17mm |
| Transition for drip hose 3/4BP | 1 PC. | For connecting a 17mm pipe to a 25mm HDPE pipe |
| End cap 700-CF-22 | 3 pcs. | For pipe plug 17mm |
| BF92 micro-irrigation faucet | 2 pcs. | To shut off irrigation zones with 17mm hose |
| Boxing double | 1 PC. | For lawn and garden valve and starter kit |
| Boxing single | 1 PC. | For flower bed valve |
| Fitting for sprinkler area - Saddle 25x1/2BP | 7pcs | For connecting sprinklers to a 25mm passing pipe |
| Corner outlet 25Х1/2"НР | 5 pieces. | For connecting sprinklers to a 25mm pipe end |
| Fitting for solenoid valve coupling 25X1 "HP | 3 pcs. | For connecting valves to a 25mm pipe |
| Collector 2-position | 1 PC. | For connection of 2 valves in one box |
| Tee 25*25*25 | 4 things.. | For distributing HDPE pipes 25mm |
| PVA cable 2x0.75 sq.mm | 60m | For connecting valves to the controller |
| HDPE pipe diameter 25mm | 110m | For plumbing |
By and large, guided by the above table, it is already possible to assemble the entire system. Of course, in your particular case there will be a different list. In any case, if you organize automatic watering of the site with your own hands, you can discuss the list of necessary items with the seller in the gardening store and make adjustments. Of course, for this you need to have a sketch of the project.
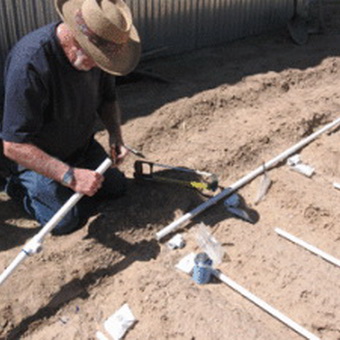
Now consider the installation in more detail. First you need to dig trenches for laying pipes. Taking advantage of the fact that no one will dig next to the paths, I did not go deeper than 30 cm. Then I had to cut into the existing water supply with tees 25x25x25 to connect the valves. In a double box, I used a 2-position manifold and 25X1HP couplings to connect the valve and starter kit. For watering on the beds, a starter kit was chosen, that is, a valve with a filter, since the nozzles on the beds are afraid of pollution. The valves and sprayers of the lawn and flower garden are connected by a HDPE 25 pipe.
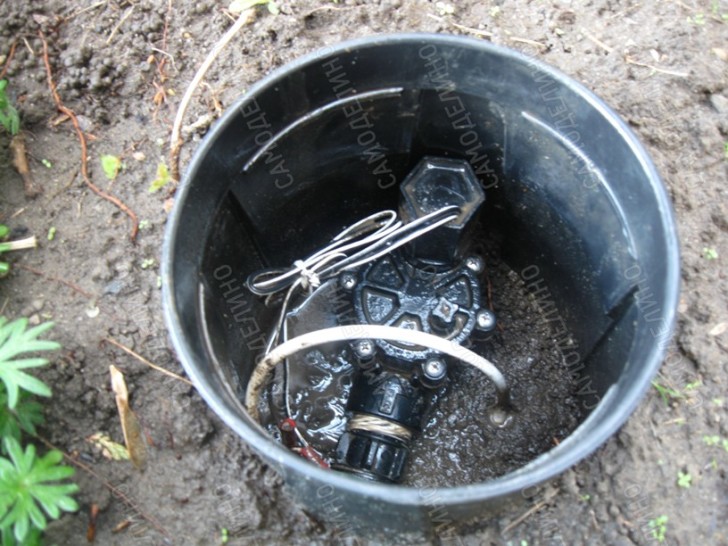 Irrigation control valve for a flower garden in a single box
 When connecting the atomizer to a pipe passing by, I used a saddle 25X1 / 2BP, to connect to the end of the pipe - an angular outlet 25X1 / 2 ″HP. Where the pipe is located deeper than the bottom of the sprinkler, an optional elbow and SPX-FLEX tubing can be used. In this case, an SBE-050 1/2″ fitting-threaded angle is required.
 Connecting the sprayer to the end of the pipe
 To connect a 17mm garden watering pipe to the valve, I used an adapter for a 3/4VR drip hose. To route the 17mm pipe, an XFD TEE union tee was required. To ensure the possibility of turning off the beds and half of the flower garden, two BF92 micro-irrigation taps were installed at the trellis on a 17mm pipe.
 Micro-irrigation taps allow you to turn off part of the irrigation
 Then I installed self-piercing micro fittings into the 17mm pipe, which I connected with the XQ1000 transfer cabin to the sprayers on the beds. I did the same on the flower garden near the trellis. I fixed the 17mm tube to the ground with racks-holders 12-16-C12.
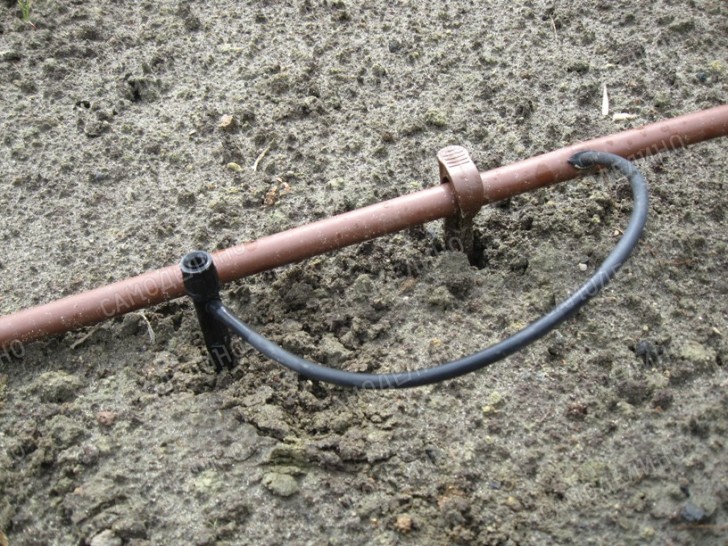 The sprinkler is connected with a self-piercing fitting and a pipe
 I laid a double stranded double-insulated cable along the pipes and connected the valves to the controller. I had to cut a seam in the paving stones to lay the cable without disassembling the tracks, and then re-seal the gap with a mixture of sand and cement. A few tiles of the walkway still had to be temporarily removed when laying the cable to the garage.
 A seam is cut along the red paving stone with a grinder, in which the cable is laid
 Connection of power and control wires to the controller was performed according to the instructions. There is nothing complicated in electrical installation. Controller setup turned out to be easier than learning a new one mobile phone although the instructions were only in English. During the test switching on of the equipment, I set the required angle of the irrigation sector for each sprinkler. After checking the entire system, the trenches with pipes were backfilled and the earth was compacted.
Some rules for the operation and maintenance of the automatic irrigation system.
First, let's set up the system for proper use. The watering start time was set at 4 o'clock in the morning. The water pressure at this time is maximum, and the earth has completely cooled down. To begin with, the automatic watering of the lawn is set within 30 minutes, then the flower garden is irrigated for 20 minutes, then the vegetable garden - for 20 minutes. In the spring I set watering three times a week. In summer, the lawn has to be watered every day.
In general, everything is individual: climate, soil, vegetation - everything is different. You just need to try and select the desired mode.
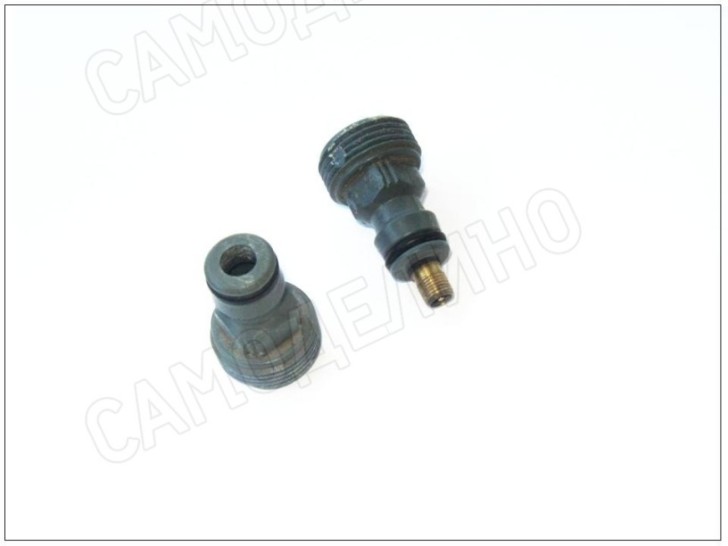 Fitting and nipple turned into an adapter
 I was pleased with the non-volatile memory of the controller, that is, the settings do not go astray when the power is turned off without using batteries. For this reason, for the winter, I simply turn off the controller from the network.
In the fall, I purge the system with air, since valves and sprinklers do not like ice. To do this, I made an adapter from a fitting for a quick-connect hose connection and a fitting for an automobile wheel. It turned out that a small compressor for painting works pays for itself in three seasons instead of inviting professional "blowers". First, I simply drain the water with a tap, then I pump the plumbing system up to 4 atmospheres with a compressor and turn on the “irrigation”. For several such cycles, all the water flies out through the sprayers.
The filter in front of the valve was cleaned once every 4 years. The injectors have never been cleaned. I decided not to use the rain sensor, since it measures the humidity at one point. It turns out a rather rough regulation of irrigation. I think it makes sense to put one if you are going to be absent for more than a month. Then the cost of wasted water will pay off the cost of the sensor.
Believe me, assembling an automatic watering system in the country with your own hands is not at all difficult and even interesting. I hope the video below will help you resolve your remaining questions. Good luck to you!
Every gardener knows about the benefits of moisture saturation of the root system of plants. With drip irrigation, you can not only provide crops with the water they need, but also deliver fertilizer directly to the roots. There are several designs of home-made drip irrigation: it’s not difficult to do them with your own hands, you just need to choose the most suitable one for your plantings.
You can buy a ready-made drip irrigation system, but since it is very easy to do it yourself, it is better to save money, which is always nice. For drip irrigation with your own hands, you will have to buy only the component parts, although you can use some improvised materials without spending money on purchases at all. It all depends on what type of drip irrigation installation you are planning - manual, automatic or fully automated.
Do-it-yourself do-it-yourself drip irrigation design device
Before you make drip irrigation, purchase the following accessories:
- valves regulating water supply;
- a meter that measures the total amount of water passing through the system;
- filter system depending on the quality of the supplied water (sand and gravel, mesh, disc, with automatic or manual flushing);
- a special unit for applying fertilizers to the soil, which ensures their gradual dissolution and entry into the irrigation site along with water;
- special pipeline system;
- distributing pipes and mains made of metal-plastic (stationary, underground placement);
- flexible reinforced sleeve for surface laying, corresponding to the required water flow;
- droppers and drip lines;
- automatic controller with programming of water supply time, its quantity and total irrigation volume (with full automation of the system).
It is best to start installing a drip irrigation system with your own hands even before the start of spring field work, at the end of winter, although this can be done at any convenient time.
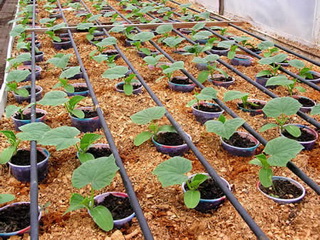
From a number of options for homemade drip irrigation, you can choose the most suitable for individual use. These systems can be used both outdoors and in a greenhouse, as well as for watering country plants that are planted in pots or tubs.
Before you do drip irrigation with your own hands, consider the following disadvantages of the system. Firstly, this is a quick clogging of the dropper due to the presence of various impurities and salts in the water. Secondly, the emergence of the need to regulate the uniform flow of water by each dropper along the entire length of the pipeline. To prevent clogging of droppers, irrigation water must first be defended. For the same purpose, a mesh filter is arranged at the beginning of the irrigation pipeline.
Do-it-yourself installation of a drip irrigation system from a water supply system in a country house (with video)
This system can be used both outdoors and in greenhouses. For the installation of such drip irrigation, you need plumbing.
Watering of plants can be carried out with a given frequency, since the system, in addition to the subsystem responsible for watering, will include others - stopping and resuming watering in case of rain, as well as emergency shutdown.
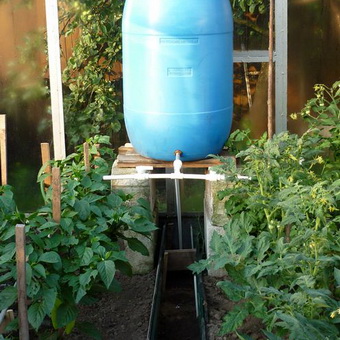
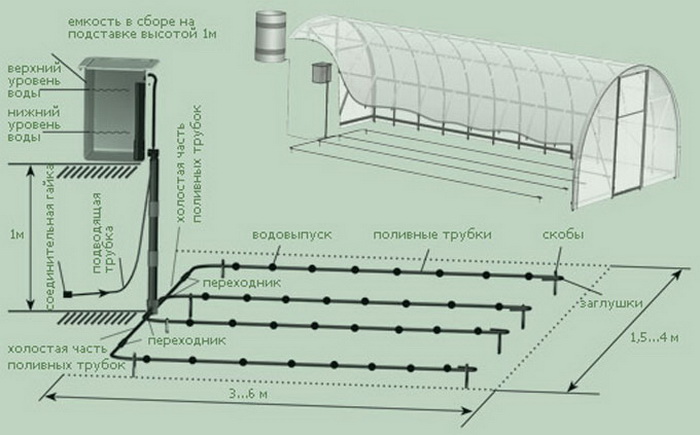
The irrigation subsystem is the main one in the system, as it is needed for periodic irrigation of plants. It consists of a large tank with an automatically tilting bucket.
A do-it-yourself bucket for drip irrigation from a water supply system serves to accumulate the water necessary to charge and start the siphon. The control tap ensures the required frequency of watering the plants with water, which, when accumulated, is heated by the sun. Also on the tank there is a tap for manual draining of water.
The tank should be installed on a stand, at a height of at least 1 m from the ground surface. It can be of any shape, metal or plastic. The volume of the tank depends on the volume of water that is required to irrigate a certain area. A row of pins should be attached to the top edge of the tank, onto which the springs and lid are then put on.
The pipeline network in the automatic irrigation system is needed to distribute and spray water over the beds.
A balance weight is attached to the rear wall of the bucket, which must rotate freely on the axle.
The position of the axis of rotation and the center of gravity of the bucket must be selected so that its upper edge is in a horizontal position when filling.
After filling, the bucket should tip over and then return to its original position already empty.
Watch a video of installing drip irrigation from a water pipe at suburban area:
We install drip irrigation in the country
Before you do drip irrigation yourself, remember that the volume of water in the bucket should be enough to charge the siphon.
A siphon is a vertically arched pipe, one end of which must be open to receive water from the tank, and the other connected to the irrigation pipeline. The height of the siphon is determined by the volume of water in the tank intended for watering the plants.
Water entering the tank must reach top level siphon, and the last portion of water from the ladle activates it.
As you can see in the photo of drip irrigation with your own hands, water is supplied to the irrigation water supply until its level in the tank drops to the level of the open end of the siphon. The flow rate of water into the tank can be adjusted with a tap.
Water from the tank must be supplied to a distribution network consisting of an irrigation pipeline with holes for spraying water, as well as hoses.
So, we mount drip irrigation - while the pipes can be given different shape, for example ring for watering trees and bushes. For rectangular beds, ordinary straight pipes are used.
The design of the subsystem for stopping and resuming irrigation in case of rain includes a rain valve, lever, pusher, tank cover and springs.
In the process of how to arrange drip irrigation, do not forget to provide a recess in the tank lid to collect rainwater - this will allow it to act as a load to close the valve.
On the periphery of the cover, you need to drill holes for its landing on the pins.
The size of the recess in the lid should be such that, on the one hand, the weight of the collected rainwater is sufficient to close the valve, and on the other hand, after the rain stops, the water evaporates in about a day and the lid can rise under the action of the springs, and the valve opens again.
Further in the course of how to do drip system watering, the pusher must be attached with the upper end to the tank lid, and the lower end to the lever. On the pusher there should be a glass of the emergency subsystem. The rain valve is usually made by analogy with the float valve in the plumbing tank.
It has been established that the rate of water extraction from the soil depends on the location of the roots relative to the soil surface.
The deeper the root system, the lower the rate of water extraction. Usually more than 40% of the moisture is extracted by the roots from the top layer of their location.
Some plants develop superficial roots well, which suffer greatly during drought. The bulk of the roots is located in the soil layer at a depth of up to 20-25 cm.
In order to completely moisten this layer, it is necessary to pour about 25 liters of water on each 1 m2 of land.
All this must be taken into account when arranging drip irrigation with your own hands for some plants that have a special root system arrangement.
The emergency subsystem consists of a glass and a drain emergency valve. When the tank overflows with water, the glass fills and closes the valve, which, in turn, shuts off the flow of water into the tank.

The valve opens under water pressure when its level rises above the top edge of the glass.
When installing drip irrigation with your own hands, the force in the stem under a given pressure must be set using a fitting and a spring.
When the set pressure limit is exceeded, the stem moves to the right.
When the ball detent moves to the annular groove, the balls fall into this groove under the action of the spring and fix the stem, thus opening the way for water to enter the distribution network through the valve.
The video "Drip irrigation in the country with your own hands" shows all the stages of installing the system:
How to arrange drip irrigation of the garden with your own hands
Installation of a drip irrigation system is carried out in several stages.
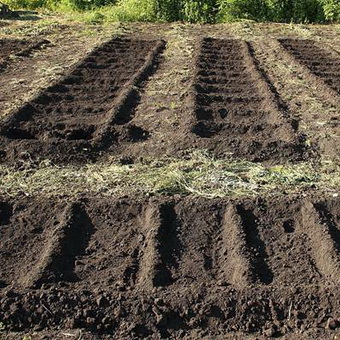
1. First of all, it is necessary to form beds, but do not plant plants on them.
2. Then you need to draw up a project plan for the site, indicating the length of the beds and the width of the row spacing, as well as the distance between plants.
So, how to do drip irrigation correctly so that the plants are saturated evenly?
The diagram should indicate the placement of the pipeline, drip hoses and individual droppers, as well as stop valves. It is necessary to mark all the junctions of the pipes - this will allow you to calculate the number of splitters and connectors, as well as taps and plugs. It is recommended to use tees as connections, although if the system uses start-connectors installed directly in the pipe, it will be possible to do without them.
3. After all the calculations, the stage of purchasing and selecting all the necessary materials follows. Before you make drip irrigation in the country, get:
- a tank or barrel as the main reservoir for water supply (especially if there is no running water);
- water filters;
- water supply taps, splitters, connectors and plugs;
- main pipeline pipes or hoses;
- filters for water;
- drip hose and separate droppers;
- electric controllers powered by self-contained batteries (to automate the system on request);
- tees or start connectors.
Since water will be supplied slowly to the destination point in the system, this will save money by using pipes of small diameter (10-15 mm). You can, of course, use hoses in the system, but it is better to use plastic pipes - they are light, do not rust, and fertilizers dissolved in water can be supplied to the irrigation site without any restrictions.
In the absence of a water supply, you will have to use a water container, setting it to create natural pressure at a height of 1.5-2 m. It is advisable to cover the container in order to exclude direct sunlight from affecting the water - otherwise it may “bloom”.
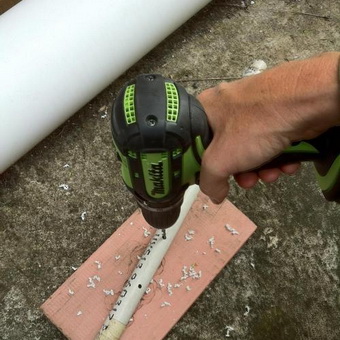
4. Having completed the preparatory work, you can proceed with the installation of pipes, first sawing off the pieces of the desired length, and then connecting them into a single system.
We proceed to the next stage of the implementation of the task “how to make drip irrigation in the garden”, not forgetting that it is desirable to lay pipes with a slight slope so that the water moves naturally, by gravity. If the site is located on a terrain with a pronounced slope, the main pipes should be placed horizontally, and the drip hoses should be placed under the slope.
Pipes and hoses can be laid on the ground, hung on supports or buried in the ground. The easiest and most economical way is laying on the ground, but in this case it is important that all pipes or hoses used are opaque, otherwise, under the influence of sunlight, the water will “bloom” in them. If the pipes are slightly buried in the ground, this requirement is not necessary, since in this case it is more important to use pipes with thick walls.
5. After laying the pipeline, when installing the drip irrigation system, droppers with fine water filters are installed in the right places, which reduces the likelihood of clogging of droppers and drip hoses.
6. The last step is to test the irrigation system, and if problems are found, they must be fixed. A trial run of the system is also needed in order to establish control and adjust the rate of water supply - this can be done by changing the slope of the tubes.
Before watering the plants for the first time, be sure to flush the entire system by removing the end caps and draining the water until clean water flows. Only after that, plants can be planted on the beds opposite the droppers installed in the system.
How to make drip irrigation in the garden: making droppers with your own hands
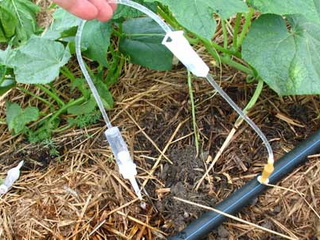 As droppers for drip irrigation with your own hands, you can use elements of the plastic part of medical systems for blood transfusion.
Drippers are the most important element of drip irrigation systems. They are installed on the pipeline and supply water to the roots of plants.
The industry produces a large number of different types of droppers. They have a device to reduce the pressure of water in the network, as well as outlets.
During the operation of the drip irrigation system, it is necessary to periodically clean the filters and droppers from clogging.
If desired, the system can be automated using electric controllers powered by autonomous batteries.
Water enters the soil at the same rate as the field capacity. Thus, the movement of water in the soil from the bottom up is carried out by capillary forces. At the same time, the loss of water for evaporation affects only the upper layers of the soil, due to which, during a period of prolonged drought, it is easy to identify plants with a shallow root system.
Installation of drip irrigation: how to lay drip irrigation
 And how to lay drip irrigation, mounted using plastic canisters? This system is similar to the first, but much simpler and cheaper.
Here you can use 5-liter plastic cans as a drive and a funnel. The top of them must be cut off at an appropriate angle and the resulting drive capacity installed at an angle, attached to a wooden plank with adhesive tape. A counterweight should be installed at the opposite end of the bar. The drive must rotate on the axis from one stop to another, which are fixed on the base.
Here you also need to fix the funnel, to the hole of which the irrigation pipe is attached.
The system works as follows. Water from the barrel enters the storage tank. After its filling, when the mass of water exceeds the mass of the counterweight, the center of gravity shifts, the drive overturns, and water flows through the funnel into the pipeline, mounted by analogy with the one described above. Then, through droppers, water enters the beds to individual plants.
When the storage tank is emptied, it returns to its original position under the action of a counterweight and is filled with the next portion of water. The volume of water entering the tank can be adjusted using a valve installed on the barrel.
In the process of how to mount drip irrigation from plastic canisters, in order to coordinate the work of the counterweight and the water storage tank, you will have to experimentally change either the weight of the counterweight, or the position of the axis, or the angle of inclination of the drive. The main thing is that as a result of adjustment, the counterweight outweighs the empty storage tank, and the tank filled with water outweighs the counterweight.
How to install automated drip irrigation
 In conclusion, consider how to arrange drip irrigation with your own hands using a pump. The drip irrigation system can be automated thanks to the usual simple scheme, which, without human intervention, will turn on the pump every day at a certain time and start the irrigation system.
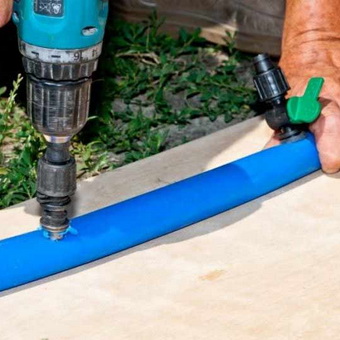
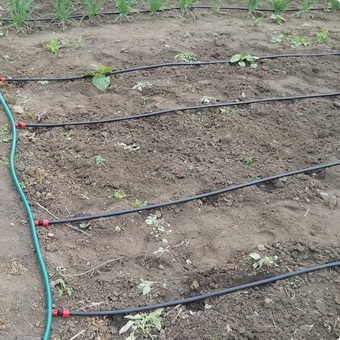
For this drip irrigation design, you need to connect a hose with through holes made in it to the pump. Holes in the hose can be burned with a hot awl - first from right to left, and then from top to bottom. This will allow water to evenly pour out of the hose even if there are blockages. Punctures should be located at a distance of 30-35 cm from one another. The hose prepared in this way then needs to be laid on the beds, in order to avoid blockages by slipping small planks under it in several places.
Knowing the power of the pump, it is possible to determine the time required to start the system, which must be fixed using the circuit for automatically starting the pump. Such a system can work perfectly on its own, and it will be enough for the owner to come to the dacha once a week.
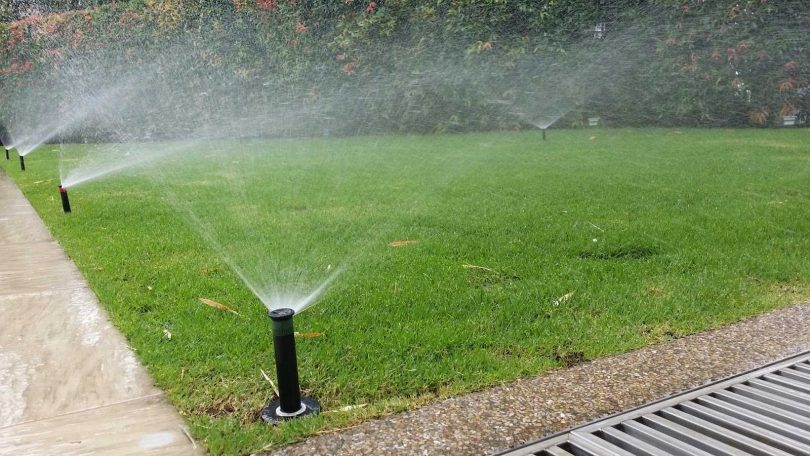
In lawn grass, the entire root system is located at a depth of about 15 cm, therefore, in extreme heat, very frequent and long-term watering of lawns is necessary, otherwise they dry out quickly, and new grass has to be sown. Lawn grass like no other culture, it is exposed to the harsh effects of sunlight and wind, which means that the soil in this place dries out the fastest.
This is the reason for the urgent need for regular and systematic watering.
Often in practice, during the operation of drip irrigation systems, one problem arises - with an economical supply, all the water flows out already from the first holes, practically not reaching the extreme ones.
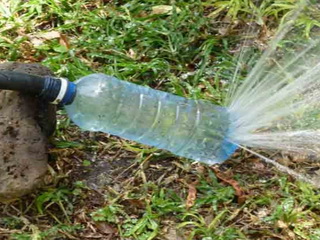
At the same time, if the water pressure is too strong, it turns out that its consumption is too high, and the soil is waterlogged. A special dispenser, which can be bought at the store, allows you to adjust the water supply. However, this problem can also be solved with a simple plastic bottle, by constructing a home-made dispenser from it according to the principle of the drain system in the toilet bowl and installing it at the junction of the distributing pipes with the water supply point. In any case, this device will help balance the rate of water supply to the beds and individual plants.
Even experienced summer residents know how difficult it is to take care of a personal plot - especially when the summer heat comes. A lot of time and effort goes into providing irrigation. Is it possible to optimize the execution of this task and somehow speed up the process? To remove a good half of the worries from the shoulders will help automatic or drip irrigation, which is quite realistic to organize with your own hands. Due to the numerous questions on this topic, we decided to write detailed guide about how to make automatic watering in the country with your own hands at minimal cost.
Advantages of automatic watering systems
Before proceeding to the construction of the system, it would not be superfluous to find out exactly what advantages it has, what benefits it can bring to the gardener.
- Perhaps the most important plus is that you will have more free time. Now you do not need to stand with a hose for hours or, what good, carry water in buckets. Plants are watered automatically without your participation.
- The second benefit is water savings. Not every dacha has an abundance of water, so drip irrigation for many gardeners becomes a real find.
- Since water will be supplied regularly, the yield of vegetables and fruits will increase significantly. By the way, the plants themselves will also look much better.
- You can choose the time of watering - for example, in the morning and in the evening.
 Automatic watering has many advantages - convenience comes first
 Does the automatic system have disadvantages?
The ideal irrigation system, alas, does not exist. Drip irrigation also has certain disadvantages, although compared to a large number of advantages, they are not so significant. The water supply can break, which will lead not only to interruptions in water supply, but also to the complete absence of water on the site.
Naturally, it will be necessary to purchase materials and equipment, and these are already certain expenses. The whole point is that when the automatic watering system in the country is equipped with your own hands, you already save money than if you bought a ready-made kit.
There are three main types: drip, sprinkler and root. Each of them will be considered in detail.
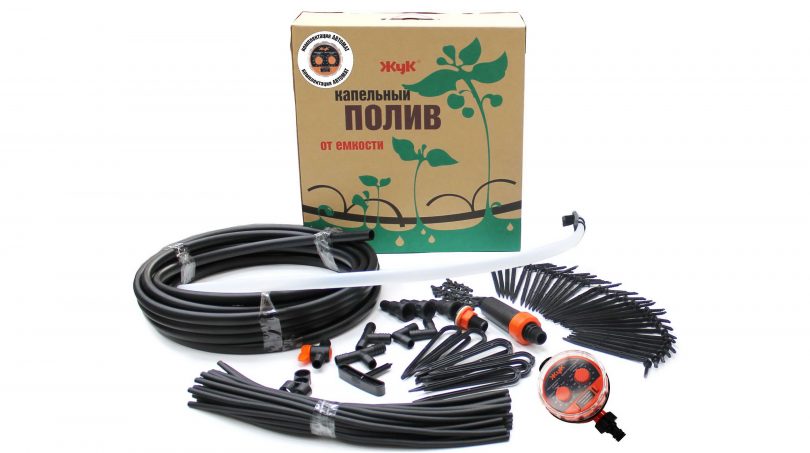 Materials for the automatic watering system "Beetle"
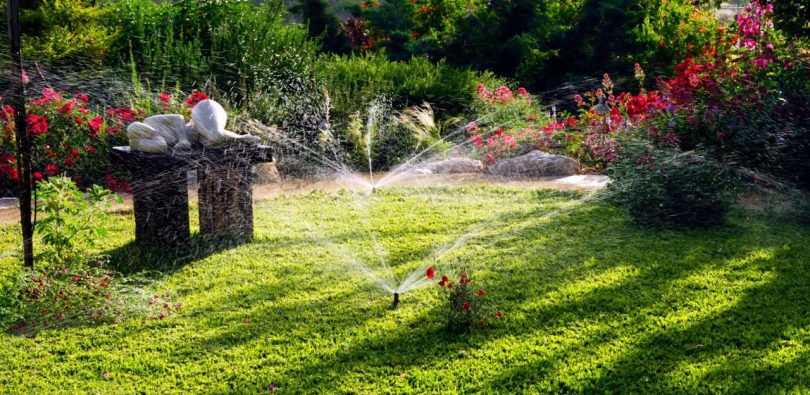
 Sprinkling
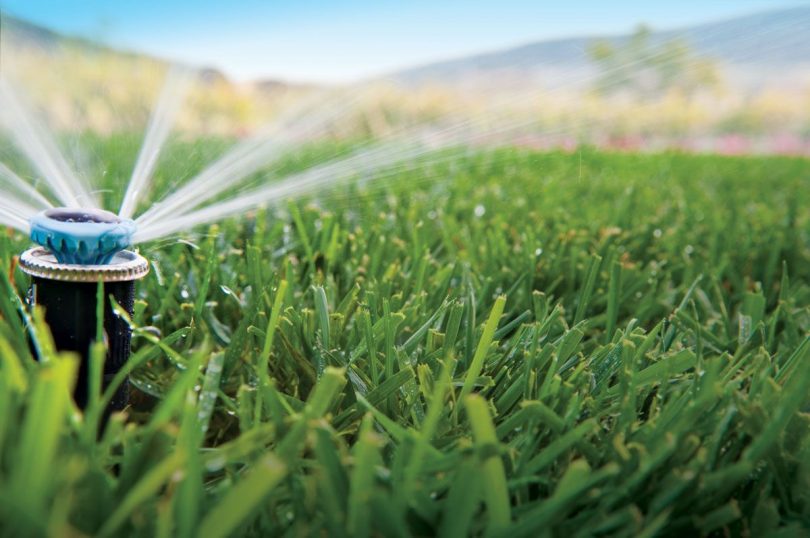
When do-it-yourself automatic watering is organized according to the principle of sprinkling, special nozzles are installed on the territory of the site. They spray water, perfectly imitating rain. Hence the name - sprinkling.
Irrigation pipes can be both underground and above it. If possible, it is better to hide them in the ground. This type of irrigation organization is considered more durable and accurate.
Let's talk about the advantages and disadvantages of sprinkling. Of the advantages, I would like to note the uniform distribution of moisture throughout the irrigation area, moisturizing not only the earth, but also the air. This is a significant advantage when it comes to a greenhouse. Fruits and leaves are perfectly washed by water - a real imitation of rain!
 Irrigation system - sprinkling
 However, as after a real rain, a crust often forms on the topsoil. This impairs the supply of oxygen. A lot of water is consumed, and electricity works with a heavy load. It is ideal for large areas, but in other cases it is better to look for another irrigation system due to lack of economy.
The technology for assembling such a system is as follows. First you will need to draw a diagram and indicate all the buildings and plantings in it. This should be done in the fall, in order to enjoy a first-class, juicy lawn already in April-May.
Assembly of automatic watering (video)
If in in general terms, then to create sprinkling you will need a kit consisting of a pumping station, an uninterrupted source of water, plumbing and sprinklers. There can be many sources of water: central water supply, another reservoir,. The pump allows you to maintain the desired pressure, and the pipeline is easily assembled from PVC pipes. Why polyvinyl chloride? Such pipes have many advantages. For example, they are easy to assemble, connections with fittings are very reliable. As for the sprinklers themselves, they are purchased with different spray angles. It all depends on the requirements of your site.
When all the components are purchased, you can begin to equip the trench. Its depth is 30 centimeters. Laying in the trench PVC pipes and collected in a pipeline. Before digging a trench, check the integrity of the system and its performance. If everything is stable and working well, you can bury and sow the lawn.
Thus, for arranging a site with a green lawn, it is best to set up automatic watering, which is called sprinkling.
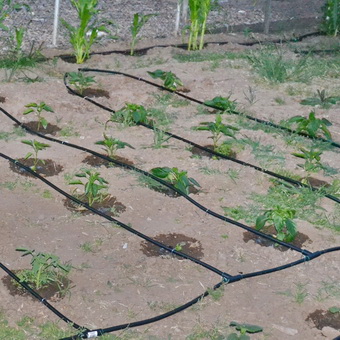
Let's talk about drip irrigation. The most common drip irrigation system "Beetle" is used for watering shrub plants. She also proved herself well in areas where the number of plantations is small. For example, in gardens. The trees are on long distance from each other, planting crops parallel. Aboveground or underground location of the system is allowed.
If we talk about the benefits that drip irrigation has, frugality comes first.
You do not need to buy a pump, water is consumed minimally. But the organization of the system can cause certain difficulties for beginners. It is labor intensive. And if the pipeline is located underground, from time to time it will become clogged with debris.
 Drip irrigation scheme
 The assembly of automatic watering begins with the purchase of flexible hoses that are easy to pierce. They are pierced with thin tubes and water is brought to each bush separately. A pump is not required - the pressure that occurs due to the presence of water at a height is quite enough.
Water slowly flows out of thin tubes. It is enough to hose the trees in the garden once with hoses - and the soil will be constantly wet. Do you want to create several branches of watering in the country at once? In this case, you will definitely need a manifold assembly or an assembly of fittings.
Installation of a drip irrigation system (video)
Root irrigation
If plants grow in your dacha that require special care, and the territory of the site is limited, we advise you to pay attention to the kit for organizing root irrigation. Irrigation is carried out underground. It does not allow roots to grow on the surface. The roots begin to strive for a source of moisture and do not climb up. The plant stays in the ground much stronger.
Let's weigh the pros and cons. By itself, automatic watering in the country with your own hands is quite economical. It does not need a powerful pressure of water, it is able to work perfectly due to the difference in height between the vessels. Since the entire set is underground, minimal evaporation is guaranteed.
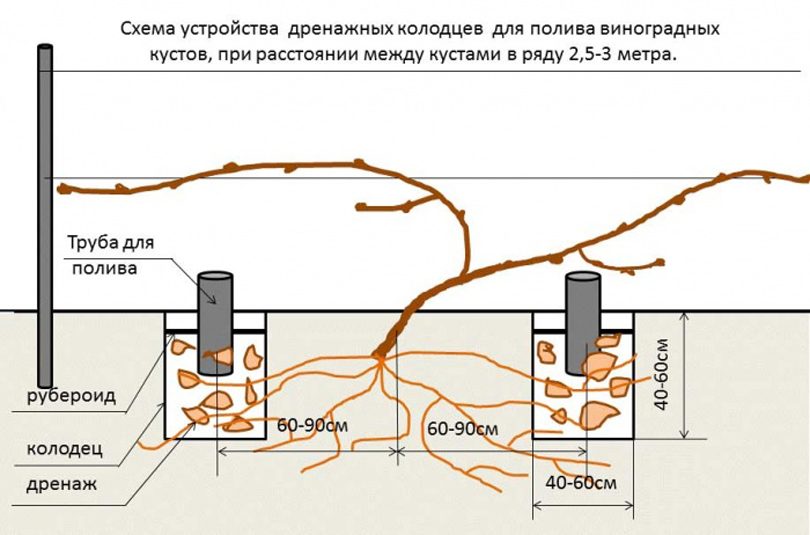 Root watering for grapes
 Among the shortcomings can be noted the complexity of the assembly and the likelihood of clogging the system. The organization of root watering on an already ennobled site can hardly be called convenient. It is especially not recommended to install such a greenhouse kit when inflorescences or fruits begin to set in plants. A root watering system made in the fall will be much preferable.
Since water does not enter the surface, but immediately into the soil, it is better to use this system for irrigation of perennial plants.
During the harvest period, they are especially in need of moisture. To increase the efficiency of the system as a whole, sand and gravel are placed in the root zone. A drainage layer is created, as in a flower pot.
The water supply is exactly the same as in the previous irrigation methods. Pipes can be flexible and rigid - it all depends on what you prefer, what kind of soil, plants, and so on.
How to manage auto watering?
Agree, when the irrigation system is fully automated, it is much easier and more pleasant to manage. Unlike manual, computer control is more expensive, but it quickly pays off with many years of comfortable use, a magnificent view of the site and a brilliant harvest.
To install computer-controlled automatic irrigation, you do not need to have any special knowledge. Humidity sensors are placed in the regulated areas. As soon as the ground becomes dry, they signal to the central computer that it is time to water. You can do without sensors. It is enough just to set up automatic water supply at specified intervals - and the garden will be watered at a certain frequency. For example, every day at 7 am or every 2 days at 18.00. Each device has its own specific installation instructions, so we will not describe it in detail.
It is curious that some modern models can be controlled using a mobile phone and the Internet. That is, being a few tens of kilometers from the dacha, you pick up the phone, launch the mobile application - and water starts to run through the pipes!
Drawing conclusions
Automatic watering system in the country – a useful and effective innovation that requires certain financial, time and labor investments. However, connecting an automatic system quickly pays off. You can turn to professionals or assemble it yourself.
We advise you to think over the functionality in advance - fortunately, the modern market has many options and a rich set of components for each specific case. We hope the article was useful for you - ask questions!
 Automatic watering system - once invested and deservedly rest!