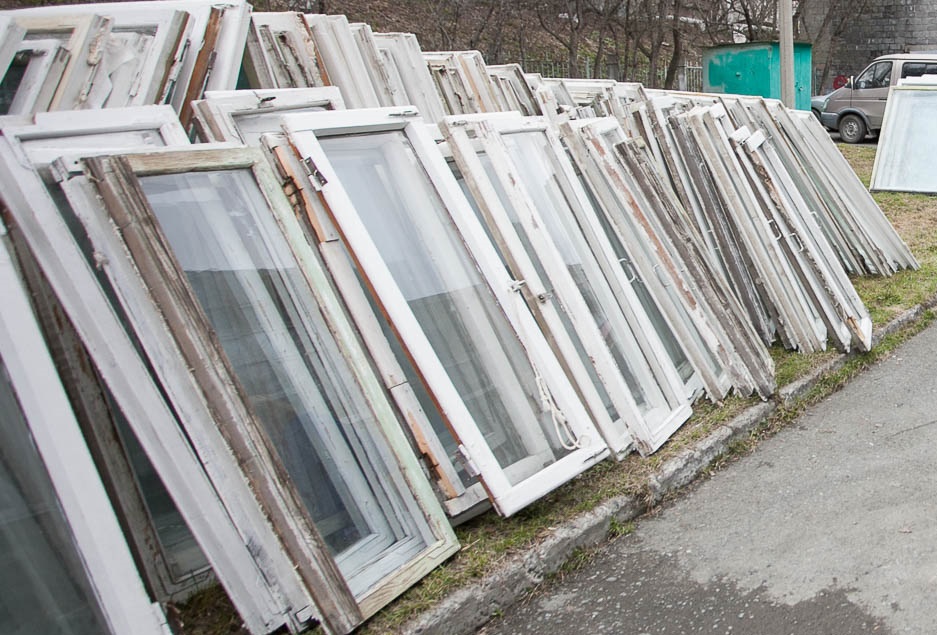
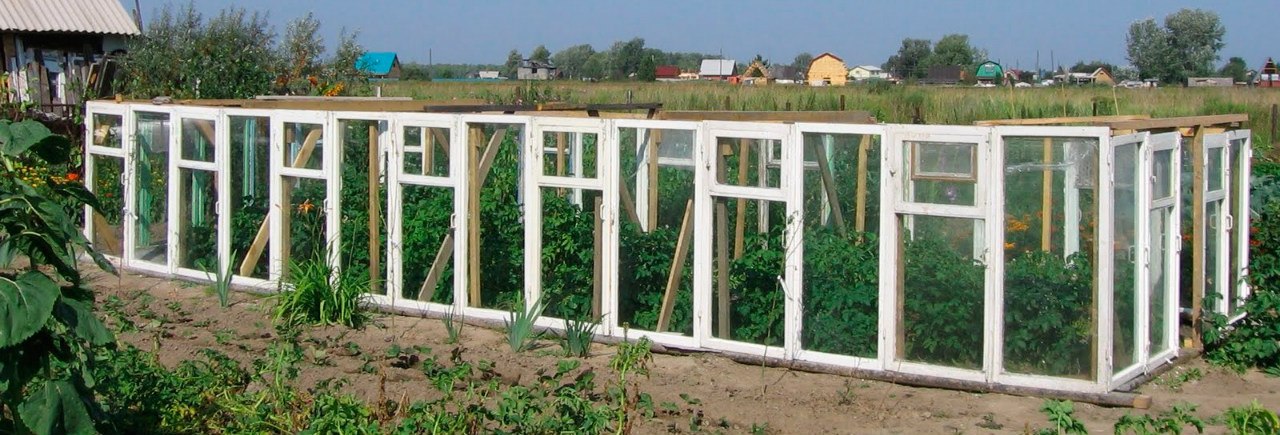
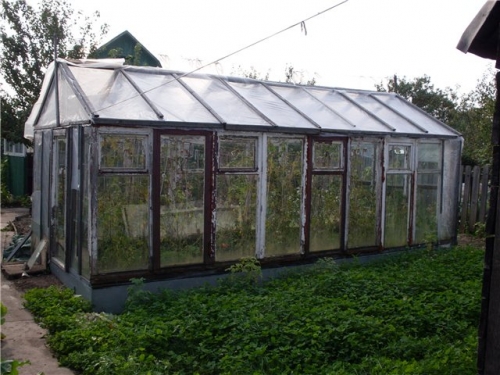
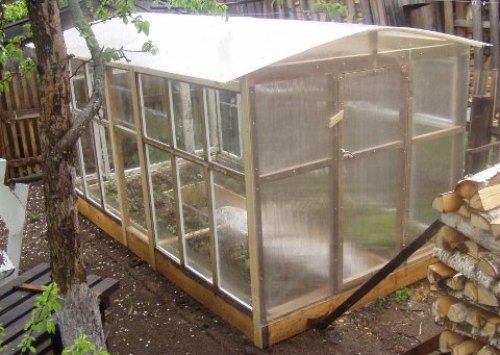
The construction of even the simplest greenhouse structure costs a decent amount. However, experienced summer residents have long learned to use old wooden frames for this purpose, left unneeded after replacing them with metal-plastic bags. And if they were no longer suitable for windows, then a self-built greenhouse from window frames is not only a budget-friendly, but also a completely functional option for increasing productivity. How should the frames be prepared and how can they be installed?
Preparing old frames for new functions
To make the recycled material more suitable, remove all unnecessary fittings: latches, hooks, handles, hinges. To avoid damage during operation, the glass is also removed, having previously marked the places in the frame with numbers. Dried glazing beads and slats are replaced with new ones, and windows that will not be used are carefully sealed or, if desired, replaced with ordinary glass. Several windows must be left to ventilate the interior space.
After this, remove the old paint or varnish and carefully treat the bare wood with an antiseptic in several layers. This will significantly extend the service life of the entire structure. Additional protection from high humidity is created by painting the frames with white paint, which also contributes to less heating of the structure from sunlight and, therefore, optimization of the microclimate. When the layers of impregnation and paint have completely dried, the windows are ready for installation of the greenhouse.
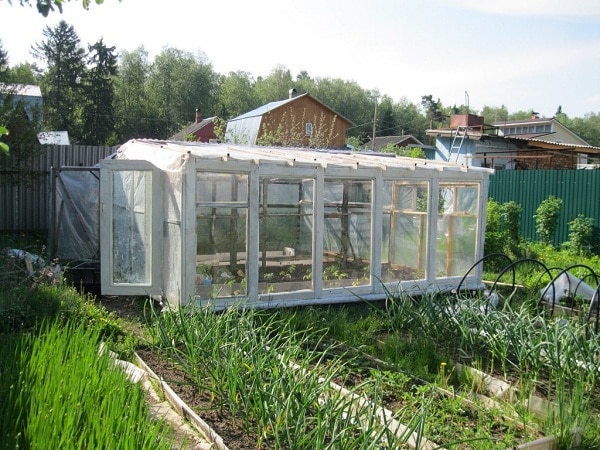
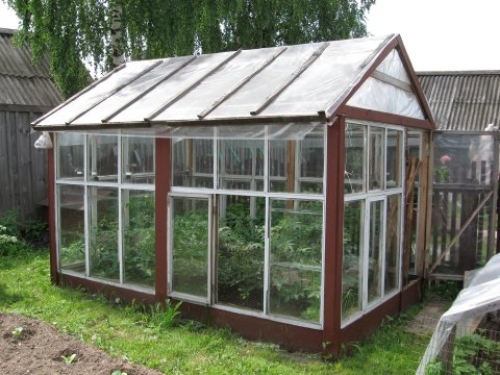
Greenhouse building made from old windows
Greenhouse or greenhouse - what to choose
Before a greenhouse is built with your own hands from old window frames, the goal is determined - whether a stationary greenhouse is needed or whether a small greenhouse will be suitable as a temporary shelter. If warm weather prevails in the region and all plants take root well in open ground, construct a collapsible mini-greenhouse, necessary only for early planting of seedlings and their protection from spring frosts. In the summer, such structures are removed and stored until next year.
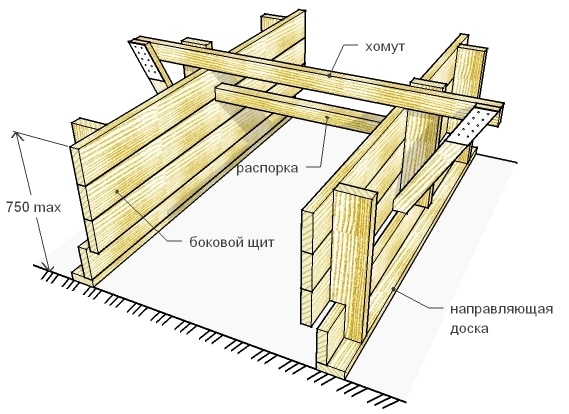
This option is lightweight, which means it does not require a foundation or a strong foundation. The frame is made from boards and beams so that its upper contour serves as the base for the sloping roof. The size and height of the greenhouse depend, first of all, on the dimensions of the existing frames, as well as on the planned height of the plants.
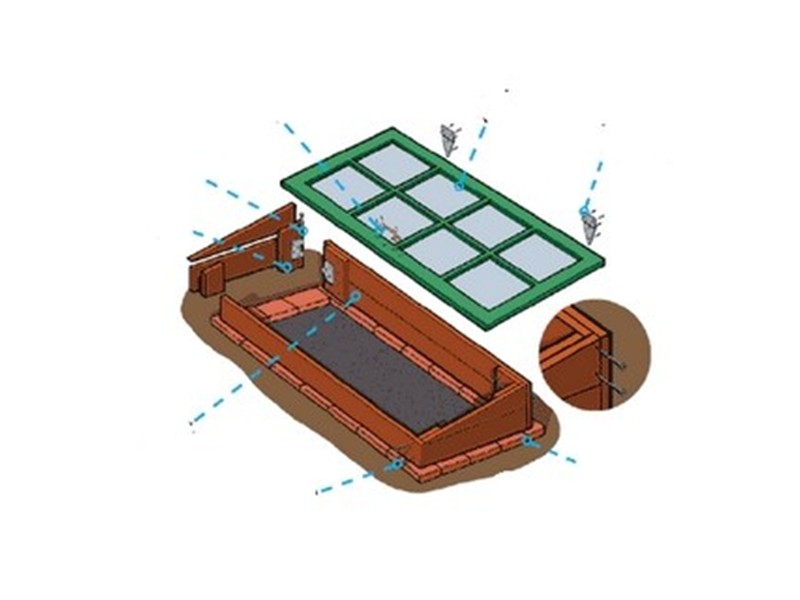
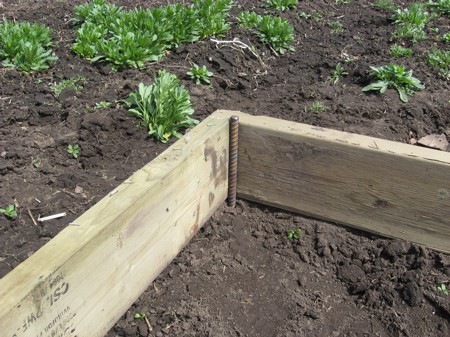
If the area is marshy, one row of red brick is placed under the frame with a ribbon. The repaired frames are laid across the greenhouse and secured with hinges to the back wall. For ease of opening, handles are attached to the edge of the frames with self-tapping screws, after which fertile soil is filled.

Wall-mounted (Dutch) mini-greenhouse
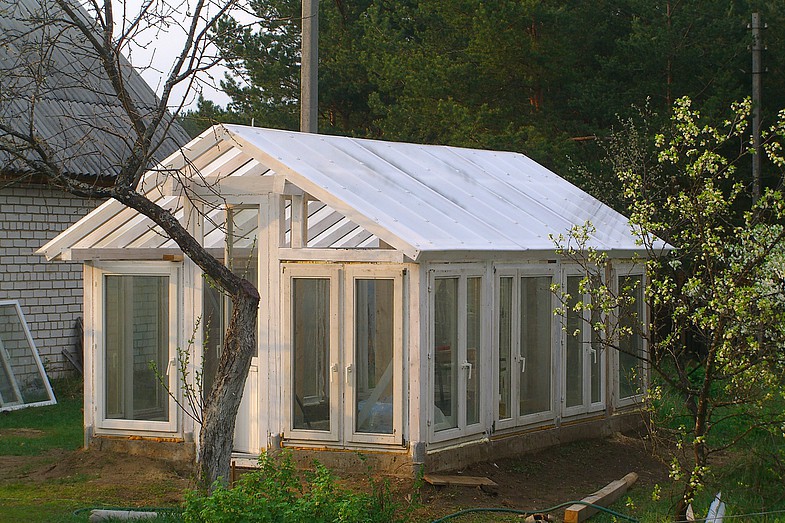
Capital construction - technology for assembling a stationary greenhouse
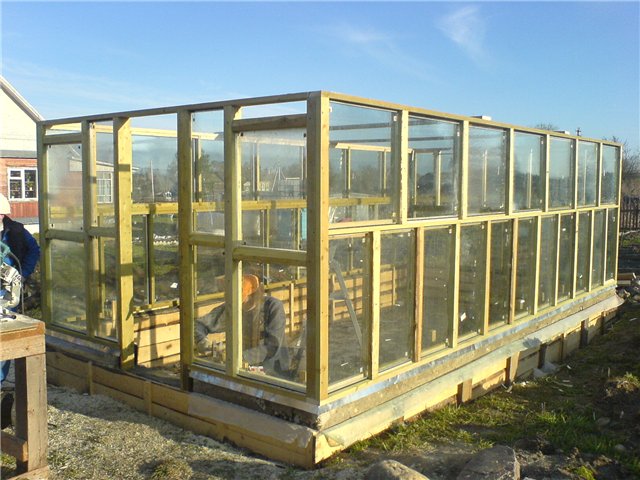
The height of this structure is about 2.5 m, which allows you to walk and work in it without bending over. Here the frames serve not only as roofing material, but also as wall material, so the weight of the structure becomes quite impressive. To build a greenhouse using window frames in this form with your own hands, you need to lay a very reliable foundation.
The costs and labor required for it are completely justified, since a stationary greenhouse can last 5–7 years, and by organizing artificial heating, it becomes possible to grow plants in it all year round.
Laying the foundation - possible options and algorithm of work
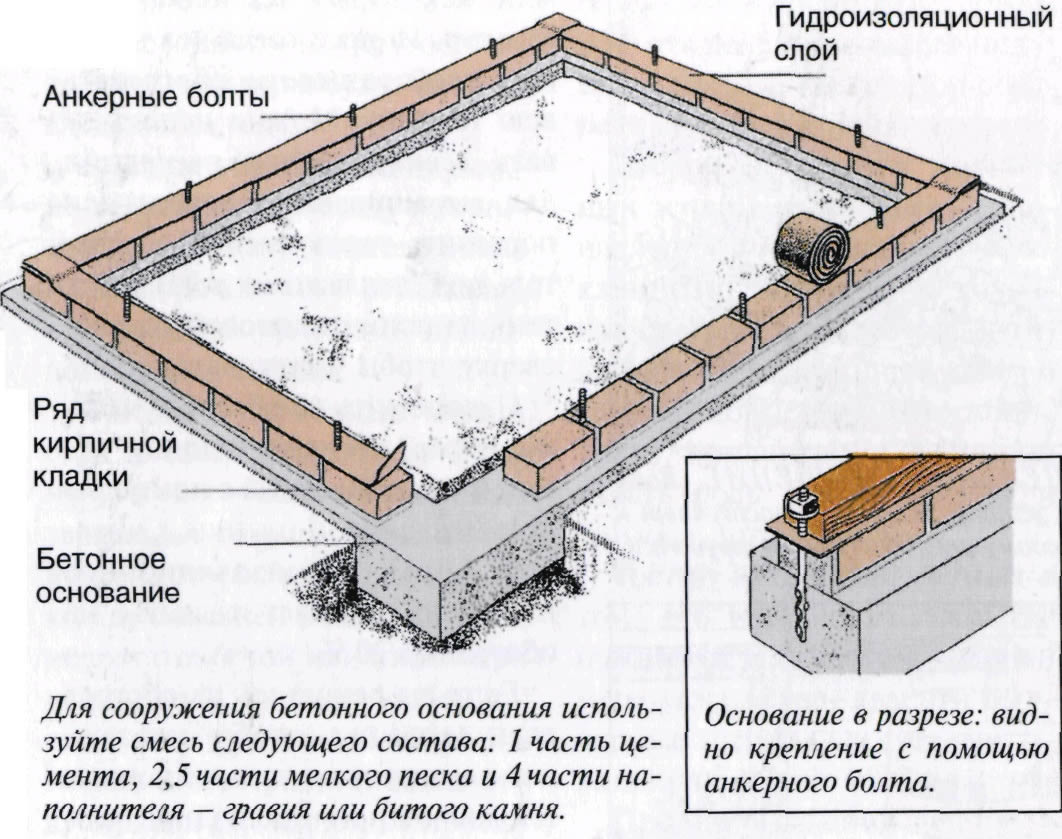
Thanks to a well-chosen base, you can obtain the desired height of the greenhouse structure with a fairly small size of the base material - window frames. In addition, eliminating direct contact with moisture and soil leads to an increase in the operational life of the greenhouse as a whole. To achieve this result, lay a strip or columnar foundation with concrete mortar or construct a wooden base from beams.
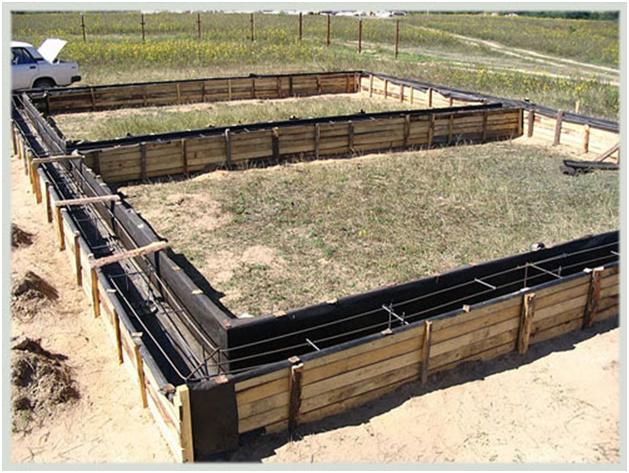
Installation of wooden formwork
Arrangement technology strip foundation for a greenhouse made from window frames is standard and includes several steps:
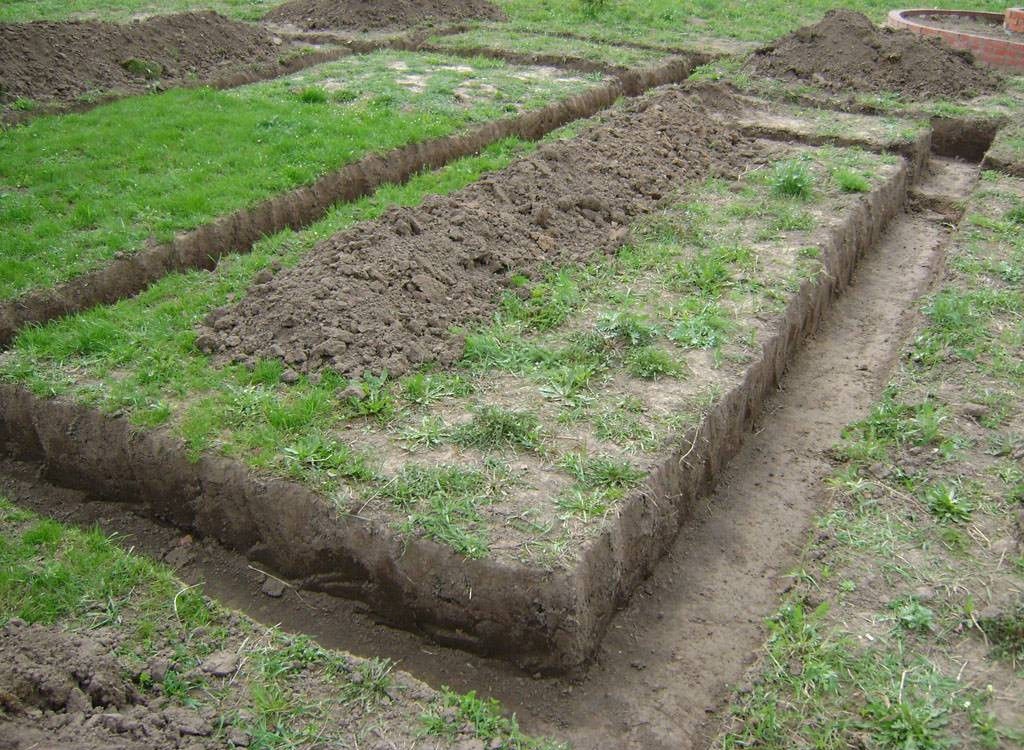
- Mark and dig trenches 20 cm wide and 50–70 cm deep.
- A sand-crushed stone cushion 20–30 cm thick is poured.
- Wooden formwork is installed above ground level.
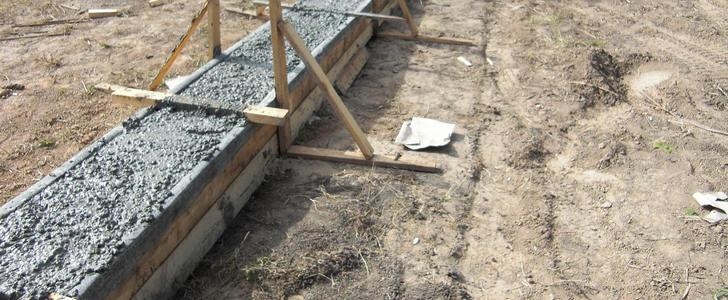
- Concrete is poured in layers, strengthening it with reinforcement.
The settling time of a rigid concrete frame depends on weather conditions - in case of changeable weather, at least a month should pass.
A frame made of beams can serve as a more economical base - it is less stable and short-lived, but is quite suitable for a temporary structure with a guaranteed service life of 2-3 years. A beam measuring 10x10 cm is treated with bitumen mastic and placed in a shallow (about 15 cm) trench filled with moistened crushed stone and covered with two layers of roofing felt. The corners of the bars are connected with corners. For better protection To protect against an aggressive environment, each beam is individually wrapped in roofing material.
Timber base for a greenhouse
A compromise option in terms of cost and solidity is the columnar type of foundation. The algorithm for creating this modification is as follows:
- Dig holes more than 50 cm deep in the corners of the future greenhouse, as well as every 3 m along its length.
- Pour crushed stone into each, moisten and compact firmly.
- The wooden formworks are knocked down and filled with a liquid concrete solution.
- Sections of timber are laid on the pillars, after which they are connected to each other and secured to the concrete base with anchor bolts.
During the process, the horizontal levels of all pillars must be monitored.
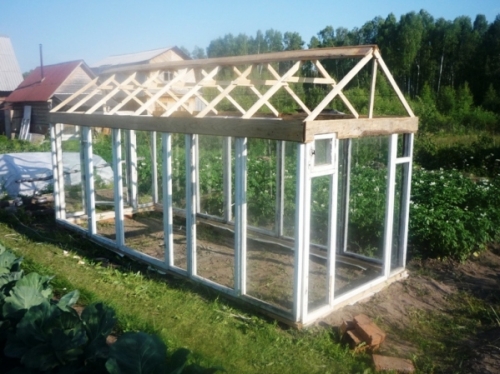
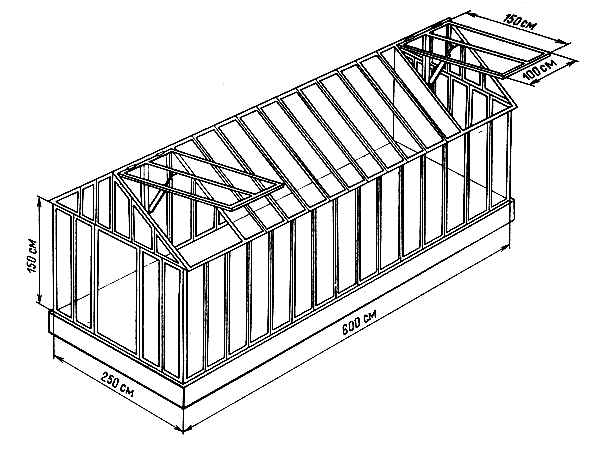
Frame greenhouse frame diagram
How to build a frame for walls and roofs - inexpensive and quick ways
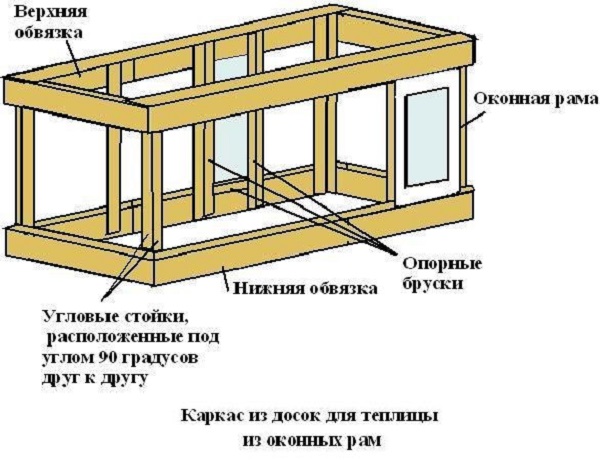
Using the existing dimensions of the base and old windows, draw out an installation diagram or drawing - in this case it is much easier to build a greenhouse from window frames with your own hands. The drawing indicates the distance for fastening the corner and intermediate posts, the installation location of doors, ventilation holes and the height of the top trim. This approach allows you to plan the length of wooden beams at which a minimum of waste will be generated, as well as their total amount.
The frame is usually made of wood, but metal corners can also be used. The lower frame is built at the stage of pouring the upper part of the foundation so that the metal adheres to the concrete. The top frame and cross posts are connected by welding or bolting, and the wooden frames are attached to the frame using galvanized self-tapping screws. To protect against corrosion, metal parts, like frames, are painted white.
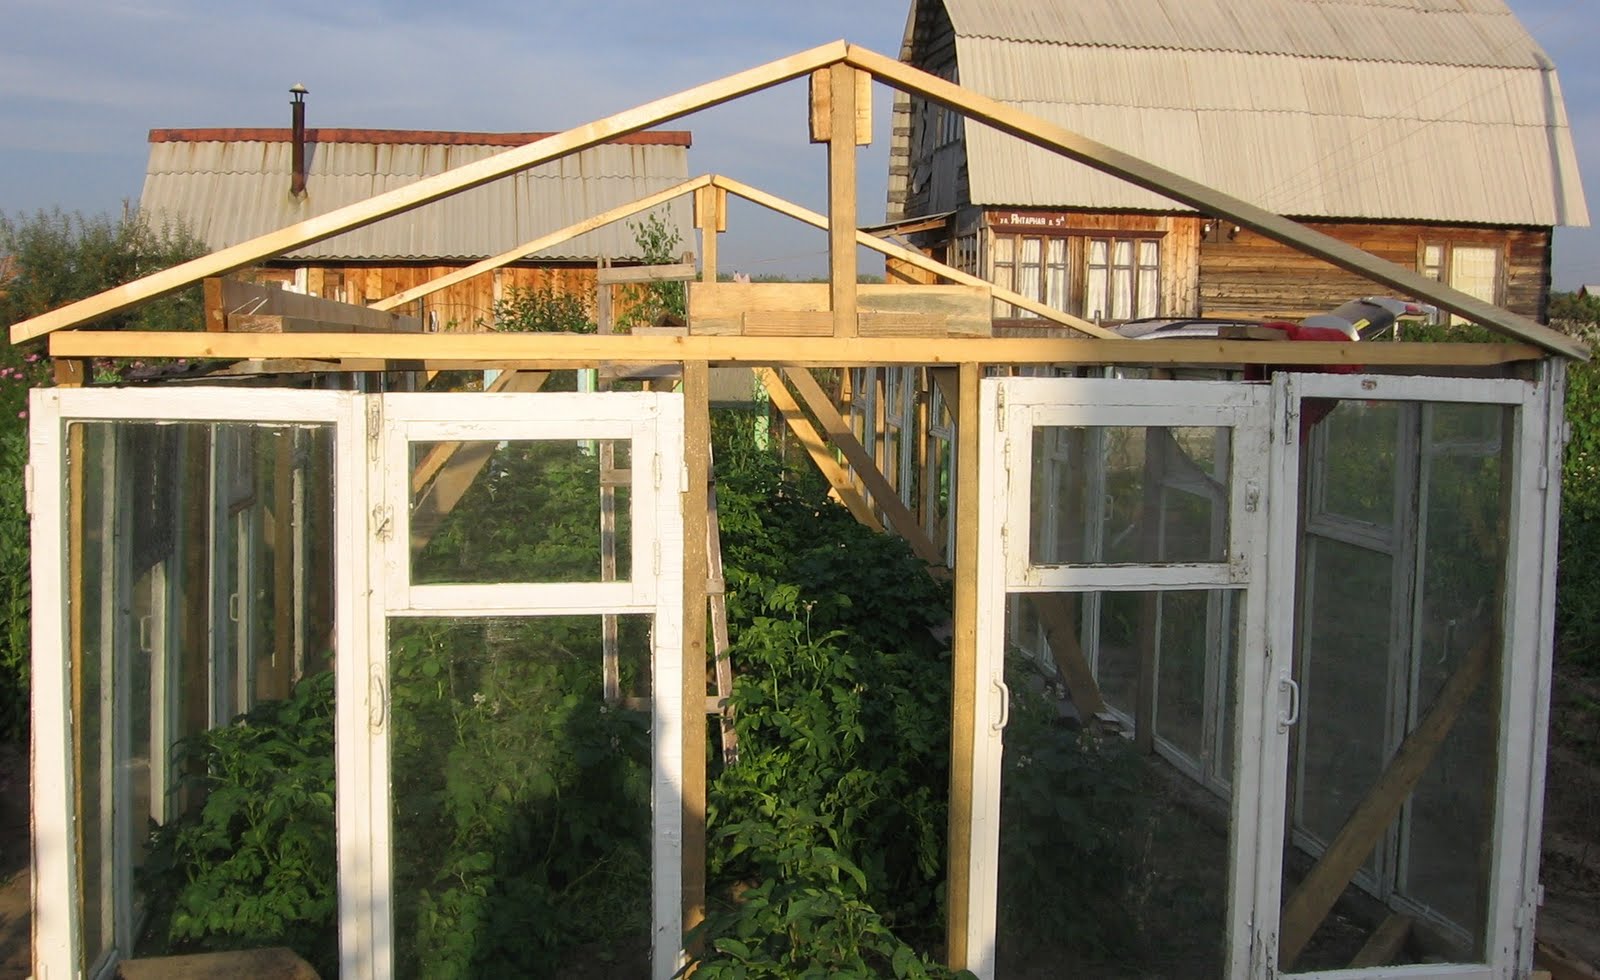
At the same stage, the roof frame is installed. The most affordable, and therefore the most common roofing material is film. Polycarbonate is much more reliable, but its purchase leads to significant costs. Window frames are rarely used for this purpose, since it is unlikely that such a roof will withstand winter conditions.

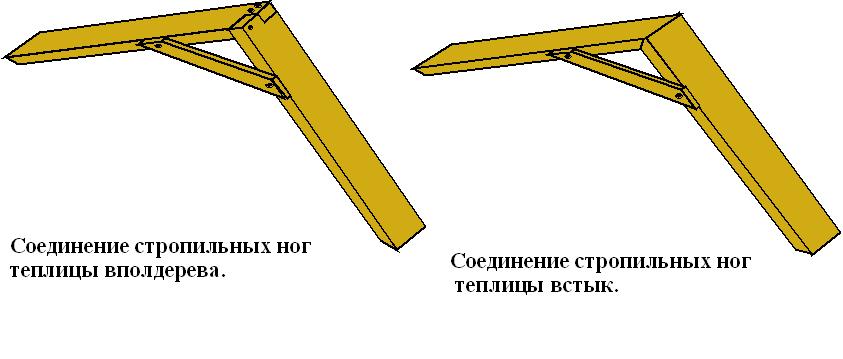
Installation of a gable roof from trusses
On the ground, rafter legs are assembled into trusses, after which they are installed at the top, secured with temporary jibs. The lathing is done in increments of 40 cm, which is sufficient if the roof is covered with polycarbonate 6 mm thick. For film roofing, the lathing pitch is usually increased to 60–70 cm.
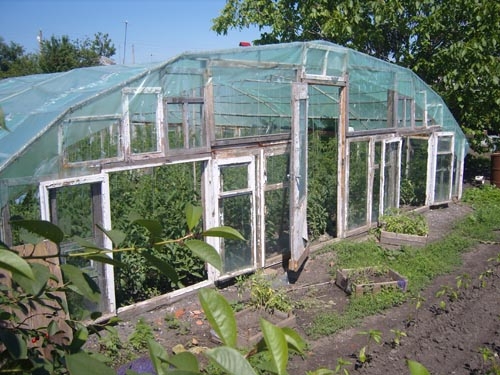
A completely functional form is an arched roof, the arched rafters of which can be ordered from a company engaged in the production of metal structures. They are also made independently from rods or pipes of rectangular cross-section using special pipe benders.
Such roofs do not have connecting seams at the top of the structure, and their streamlined shape is more resistant to snowfall and gusts of wind. With the same dimensions, the height of a greenhouse with an arched roof from the inside is greater, which greatly facilitates the work of caring for plants.

Arched roof frame drawing
Installation of frames and fastening of covering material to the roof
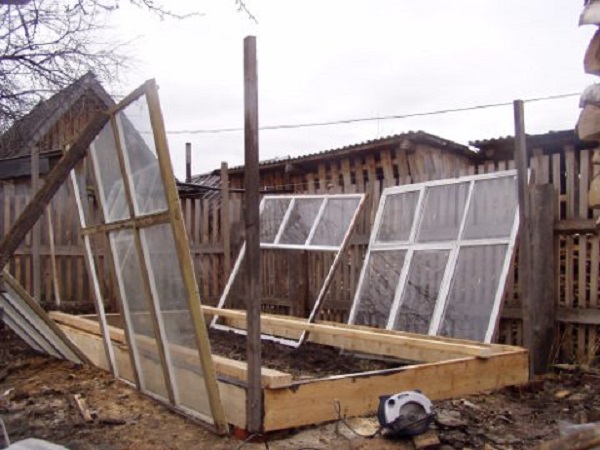
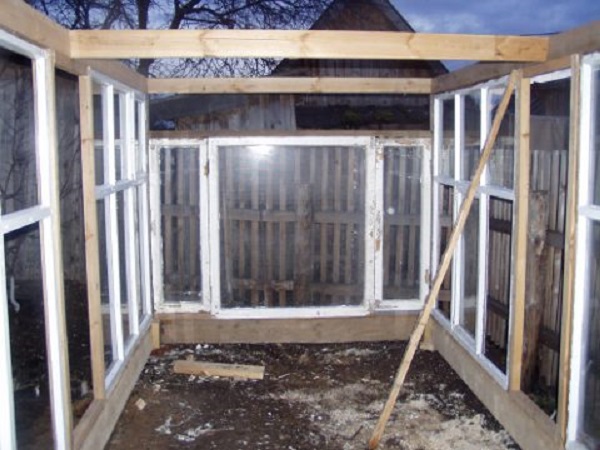
Previously repaired and painted frames are attached to the racks of the finished frame using corners, plates and self-tapping screws; Doors are installed on hinges. The resulting cracks are filled with polyurethane foam, and wooden planks are placed on top of it. The glass is secured with glazing beads and sealant to prevent micro-drafts. Frames with vents are mounted on both sides of the greenhouse, thus providing the possibility of air exchange. When closed, doors and vents must fit tightly to the frame and be secured with hooks.
The final stage of creating a greenhouse from window frames with your own hands is covering the roof of the greenhouse with the selected material. It is difficult to cover the frame with film alone, so they usually invite an assistant to create an even tension. You cannot nail the film simply with nails - this significantly damages the material.
To extend its service life, wooden slats are used, which are secured with nails, screws or staples using a construction stapler. Cellular polycarbonate panels are cut in the right places with a hacksaw and installed taking into account the vertical arrangement of the stiffeners.

Covering the roof with spandbond
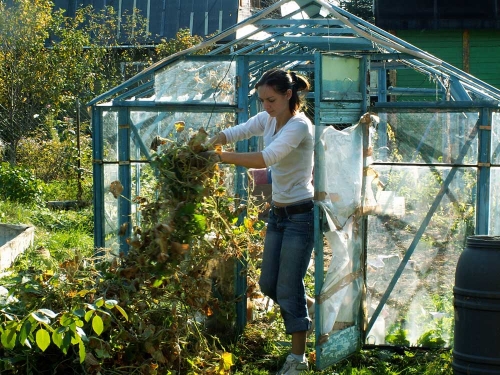
Caring for such a greenhouse is simple, but requires attention to detail. Every spring, before starting work, all the main parts are checked - the foundation, racks, floors. If cracks appear, they are eliminated with mortar (foundation) or part of the structure is replaced with a new one (racks). Wash dirty glass with a rag, preventing excessive water from flowing into the frames.
Polycarbonate roofing is also cleaned warm water with the addition of laundry soap. Under no circumstances should products containing ammonia, acetone or other solvents be used. By properly designing and carefully operating the greenhouse, you can be confident in its reliability and maximum possible durability.
Having been inspired by ideas and photos of greenhouses made from window frames, built by enterprising summer residents with their own hands, you can get down to business. If you don’t have your own frames, then it won’t be difficult to purchase them at a low price by negotiating with companies to install new windows - they will tell you where repairs are expected.
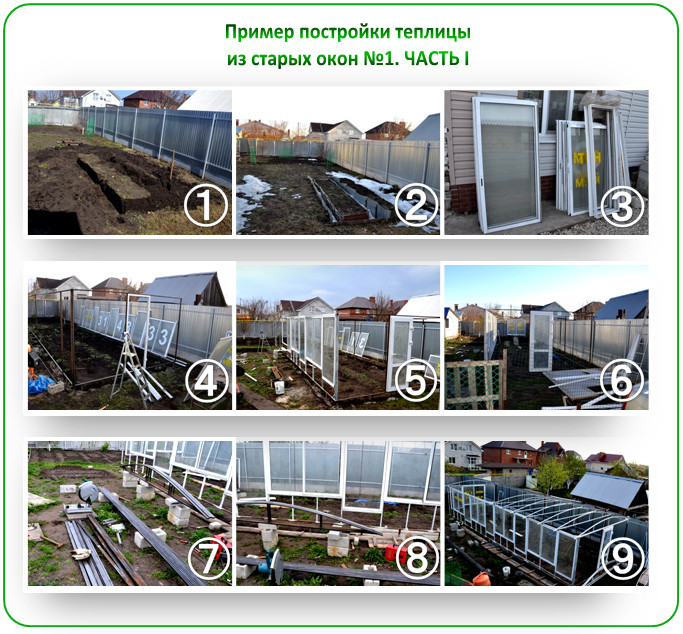
How economical a dacha owner is depends not only on how savvy he is and his budget, but also on his ability to make things with his own hands. A greenhouse made from window frames is quite practical, and the most minimal investments will be needed, since two issues are being resolved at once: replacing frames in a city apartment and building a greenhouse on a suburban area. Let's consider a step-by-step algorithm for building such a device on our own land.
1. Making the foundation
The base of the greenhouse must be made, since wooden frames weigh quite a lot, plus it is necessary to cover the structure; other materials will be added, due to which the weight will be even greater. Accordingly, to ensure that your greenhouse made from window frames does not get damaged or sag over time, you need to install it with your own hands reliably and steadily, for which you will need to build a foundation. There are different materials for laying:
■ Brick - very reliable, but not very cheap. If installed correctly, it will last quite a long time. But it can also be damaged by constant temperature changes or excessive humidity. At the same time, it is absolutely stable and strong enough; it can easily withstand the wooden structure of a greenhouse.
■ Stone - This is a durable material, but very expensive. You can even install on it polycarbonate greenhouse with a metal body. Its base is durable and it copes with the effects of different weather conditions. If you take untreated stone, the price of the material will be much less.
■ Wooden foundationIt is distinguished by its durability, it is also stable, but will not last too long. Literally up to eight years and it will have to be replaced. But it is perfect for DIY greenhouses.
■ Concrete - tape version made from cement. Reliable and durable. Will last for many years.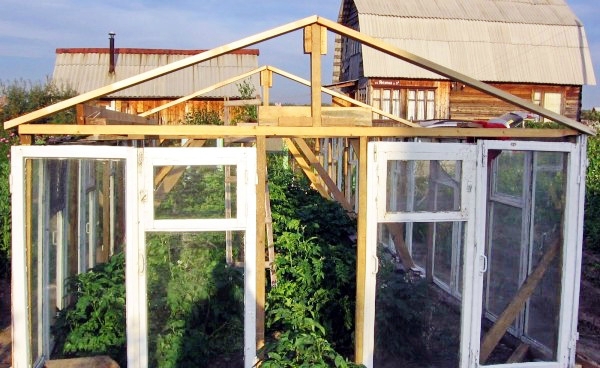
Based on the foregoing, it is up to you to decide which material for laying the foundation for a greenhouse is acceptable to you. To build a foundation, the soil should not be swampy or too wet, otherwise the greenhouse will sag very soon. The ideal option is when there is a layer of sand under the soil layer. If there is none, you need to do the following:
■ Fill the clay with gravel, spread it well, then add sand to a layer height of 15 cm.
■ Check that there is at least one and a half meters of groundwater penetration.
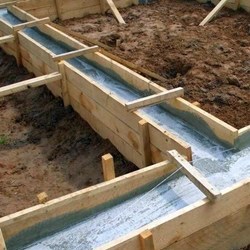
■ To install a strip foundation, you will need to dig a trench up to 50 cm deep. Make formwork. The boards can be wrapped in film to prevent them from “attaching” to the cement. At the bottom, place wire reinforcement or just large enough stones for reinforcement. Next, pour in a mixture made from: cement, crushed stone, concrete.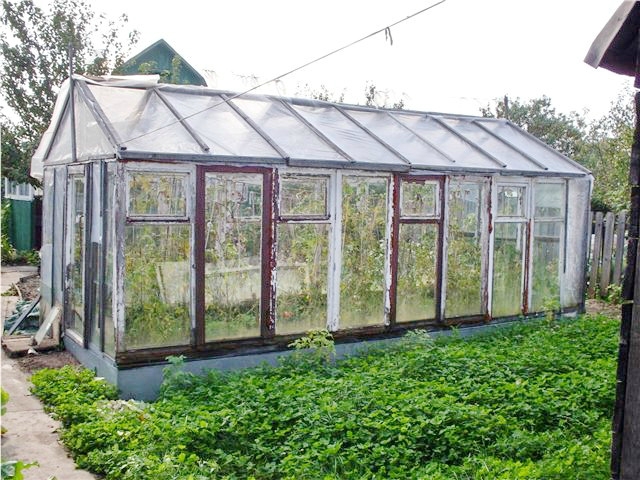
This must be done in such a way that the voids are completely filled.
Next, you need to remove the boards, make waterproofing using bitumen composition, roofing felt and polymer material. If sinuses form along the edges, fill them with moistened sand and compact them. All this will take about three weeks (including complete drying of the foundation). Therefore, count on these deadlines before starting to build a greenhouse.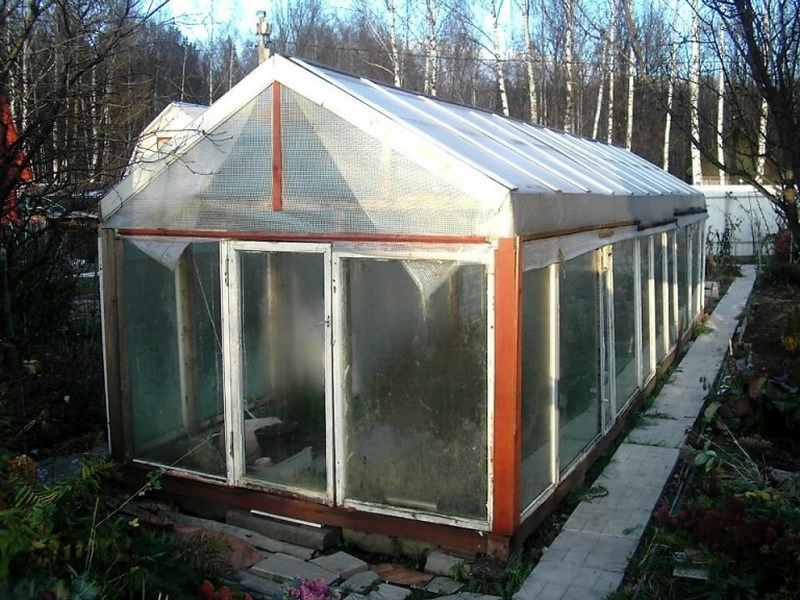
How to install the frame?
A greenhouse made from old frames is a completely self-sufficient frame that requires correct installation with your own hands, fastenings and coverings (including lathing). To build a reliable greenhouse, the frame must be installed securely. Window frames must be installed on the foundation and securely secured using corners, self-tapping screws, wooden blocks, nails or clamps. Building a greenhouse from old frames with your own hands is generally not difficult at all. The main thing is to adhere to the important rules of simple construction. Plan all the work in advance, think through and write everything out step by step.
Place the frame on the foundation. To secure the components to the foundation with your own hands, use metal corners. They are inexpensive and quite durable. In order to secure it to the base of the greenhouse, you will need: welding, bolts and anchors. After which you can attach the old frames.
Don’t rush, do everything correctly, installing the next element on the foundation, fastening it together with the next one. Then you will be able to make the greenhouse frame with your own hands strong and stable, preventing subsidence into the ground.
Video “How to build a greenhouse from what you have at hand”
This video tells and shows how to make a greenhouse from what you have on hand. Window frames act as walls.
Installation of windows and frames
Since the structure itself will already be quite heavy in weight, it is not worth adding additional weight to it with windows. Nevertheless, some reproduce their greenhouses in this way, but this mainly applies to small structures. Most best option shelters are polyethylene film.
To equip it, you need to make a light version of the sheathing around the perimeter of the upper part of the greenhouse. Use steel wire, slats or mounting profile. When the sheathing is installed, you can stretch the film. To fasten it, use clamps and clamps, and you can also make regular holes for fastening.
Roof installation
When you are just planning to build a greenhouse yourself, think about what kind of roof it will have: single or gable. For example, if there are not enough details, then, of course, you can only make a lean-to version. He is satisfied with the most in a simple way, the main thing is that the slope is sufficient so that the water can drain without difficulty during and after rain.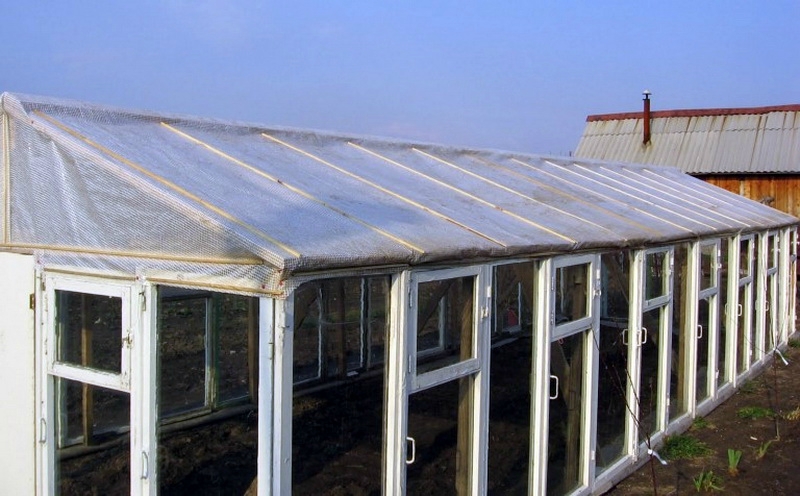
The gable roof option is much better, regardless of the material that will be used for its construction. The processed frame blanks are laid in the standard way, they are nailed down and covered with a ridge (made of wood or plastic) on top. It is important that the surface is sealed, especially at the junctions of glass and wood. Indeed, in the event of leaks, an unfavorable environment may be created inside the greenhouse, for example, mold or plant diseases.
If the walls of the greenhouse are made from old frames, they go well with polycarbonate. For example, if there is a shortage of materials that you will prepare for arranging a roof in a greenhouse, you can use polycarbonate or greenhouse film. Of course, this is not glass, but in terms of properties, the microclimate inside the greenhouse will not become worse if there is another material instead of glass.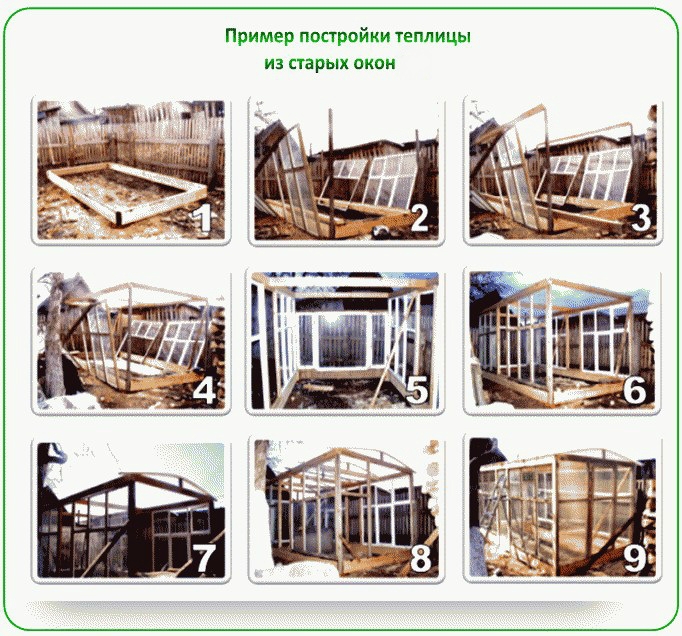
To make a good, solid greenhouse, it is not necessary to make drawings, the main thing is to be able to tinker and be a savvy gardener. Upon completion of all work, from laying the foundation to stretching the film, double-check yourself to see how correctly you did everything.
Video “Answers to questions about building a greenhouse from window frames”
In this video you can see a greenhouse made from window frames and hear answers to many questions about the construction.
Beautiful greenhouse for relaxation and gardening
Few people think that a greenhouse can also be used for recreation. Usually its entire area is saved beyond measure in order to grow more seedlings or tomatoes. We offer an alternative - a principled approach to the dacha not only as a place for growing food and flowers, but also as a paradise for your relaxation and your entire family.
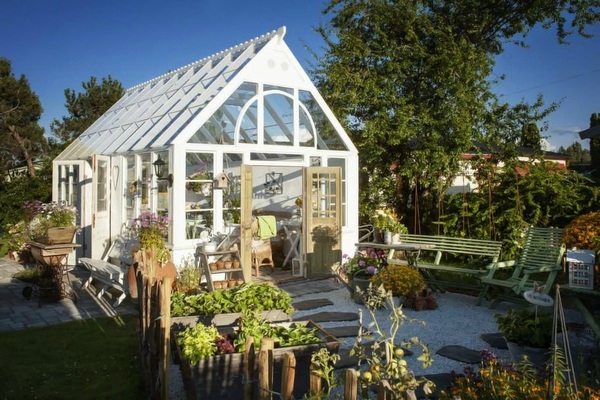
This greenhouse is a clear example of how such an idea can be realized with the help of a few ideas. By placing a chair, candlesticks inside, and placing decorative elements here and there, you can transform the overall image of the greenhouse. Prepare a wooden box, which can become an excellent stand for books, tea and dessert. After all, in such a greenhouse you will probably want to read books for a long time or even take a short nap, taking out soft pillows from a wooden box on the floor.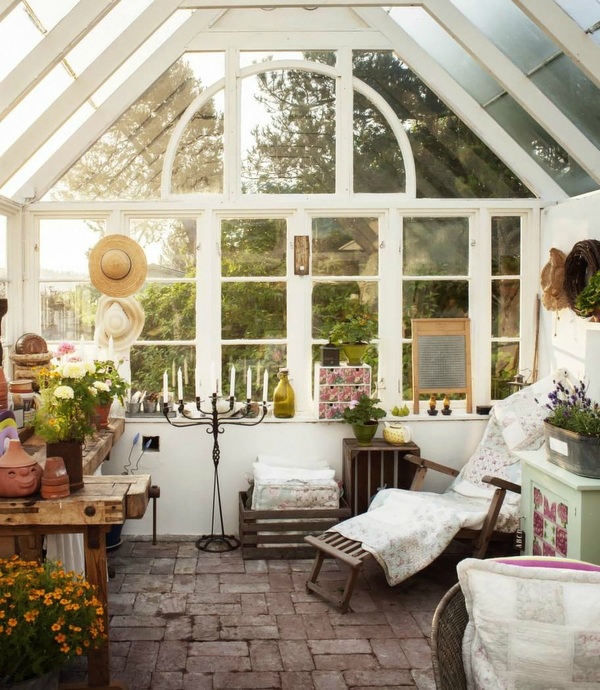
In addition, the space around the greenhouse can be completely changed even without significant costs. Old small wheelbarrows and shovels, clay pots, albeit slightly beaten, and even an old footrest sewing machine- everything can be used for decoration. The main thing is that such old things are complemented with decorative ones - flowers, an angel on the window frame, twine tied in a bow. Thus, you organize a whole small exhibition in the name of beauty at your dacha.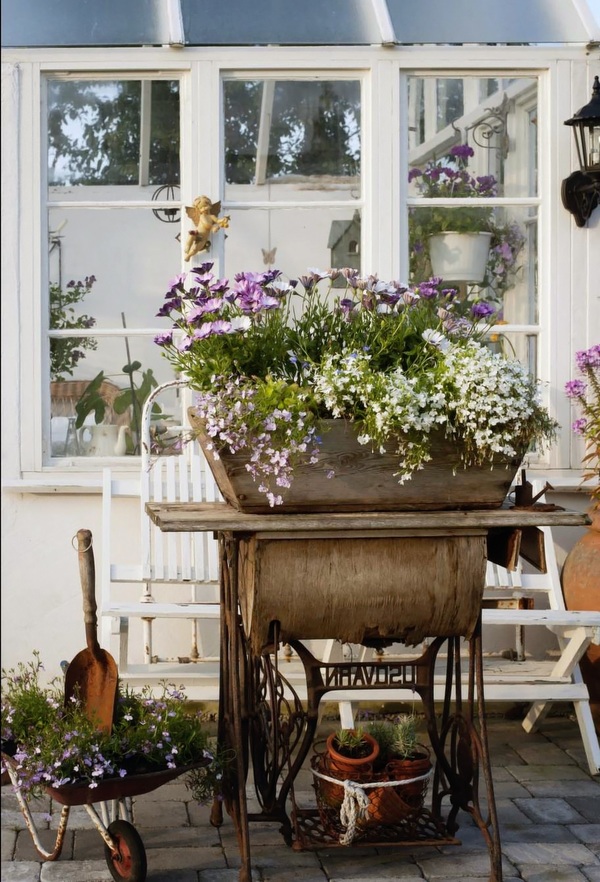
There should be room inside for both plant decorations and interior items. For example, vases or candlesticks. Flowers alone are not enough to create the bohemian atmosphere of a greenhouse like a winter garden in an old English mansion. But together they will work like a charm.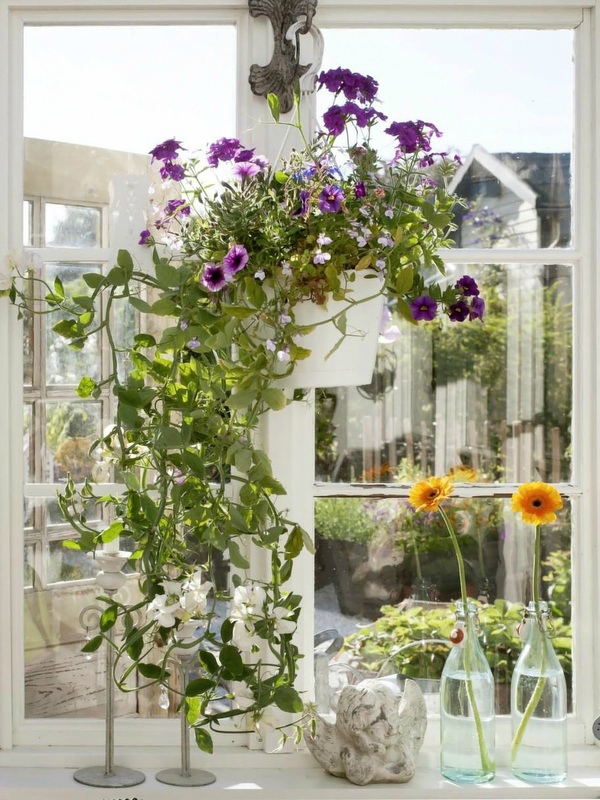
In fact, no small thing is completely unnecessary. From it you can create beautiful compositions that will decorate a certain area in the country. Look at the old window frame, to which the owners of this greenhouse just nailed an iron rod folded in the shape of a heart. And instantly it became an art object that reminds either of the story of Romeo and Juliet, or of a small French summer cafe.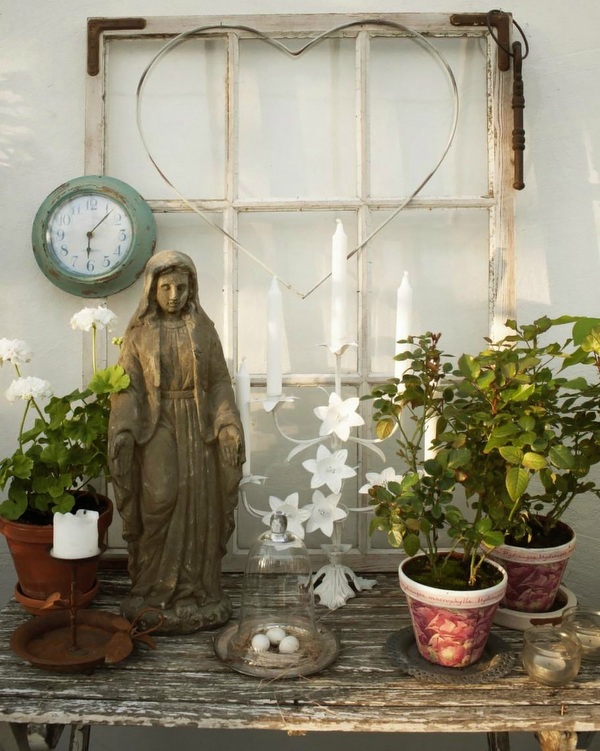
Decorating a greenhouse with plants is also worth it in a special way. For example, pairs or trios of plants of the same type, displayed in accordance with some idea in identical pots, will look beautiful.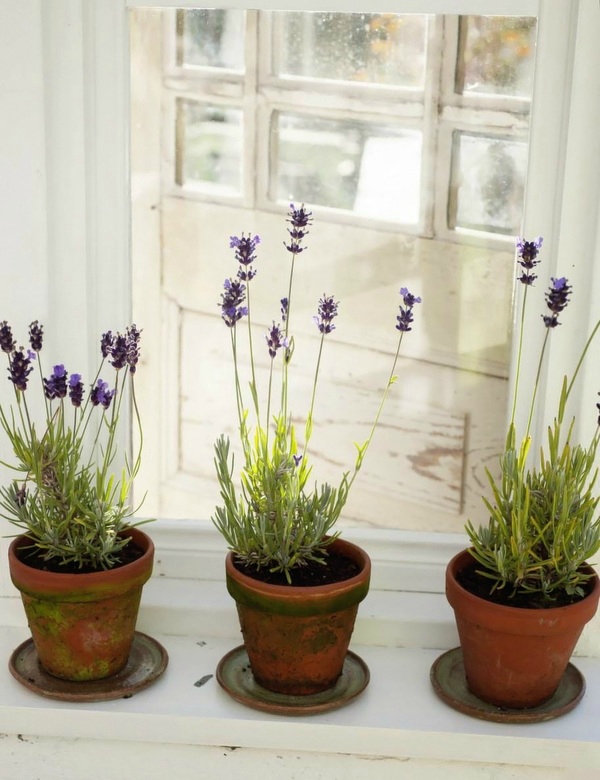
And so, creating one composition after another, you will be able to fully equip the greenhouse and the area around it beautifully and without unnecessary financial costs.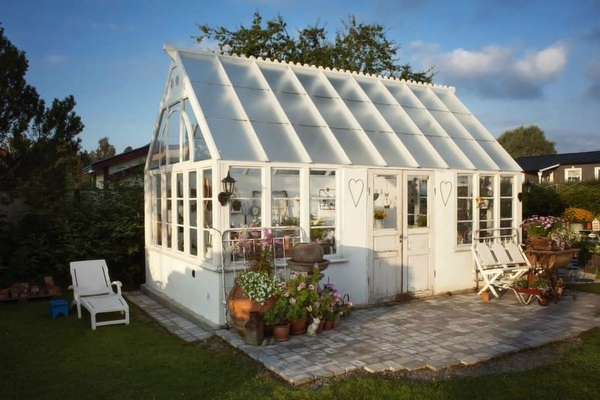
Ready-made greenhouses from stores, made of cellular polycarbonate and aluminum profiles, are very beautiful. It’s hard to argue with this, but, unfortunately, you have to pay a lot for such beauty. The cost of ready-made greenhouses is too high, so not every gardener, even a very avid one, can afford to make such a purchase. There is a way out - to make a greenhouse yourself. This will require ingenuity, desire and skillful hands.
Let's consider a method for making a greenhouse from window frames. For work you will need whole wooden frames, without broken glass.
Advantages of greenhouses made from window frames
Having a greenhouse will improve the harvest. A greenhouse is especially helpful in the cold spring, when it is not yet possible to plant plants in open ground. When planting seedlings in a greenhouse, the plants will begin to grow and develop quickly, and will bloom with the arrival of the first warmth.
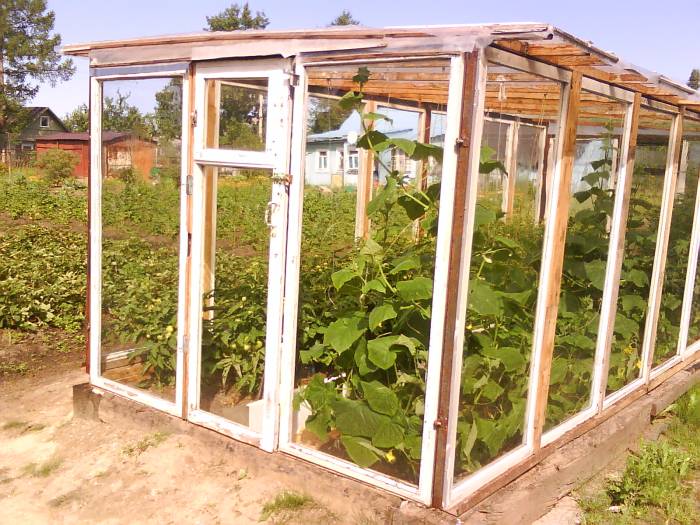
Most city residents are replacing old wooden window frames with modern plastic windows. After replacement, old frames are usually disposed of. And in vain, because not everyone knows how to use this spent material. If you have old window frames, you can build a good greenhouse. Glass in this design helps maintain optimal temperature conditions for growing various types vegetable crops. Using wooden frames will create a durable frame that will support the structure for many years.
Window vents can be used to provide ventilation in the greenhouse. They can also be used to regulate the temperature. Building a greenhouse will not take you too much time. This is a simple process, the main condition for success in which is following the step-by-step instructions.
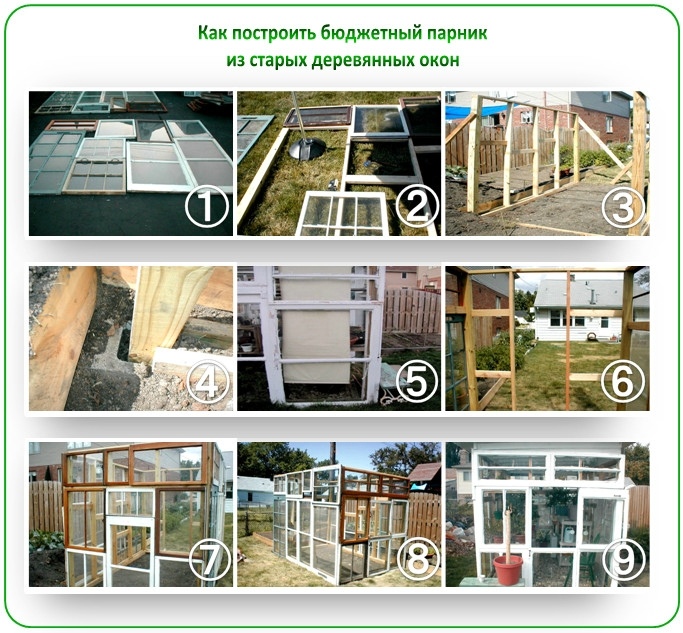
Preparation of materials
The work will only require a few window frames, so finding materials should not be too difficult. If you don’t have old products lying around in your garage or on your balcony from the time you replaced your windows, then contact your neighbors or friends. Some of them definitely have the necessary frames at home. At worst, you can contact representatives of the company that does the installation. plastic windows. After completing the repairs, they throw the old window frames into a landfill. By reaching an agreement with them, you will solve the problem of preparing the material.

Having collected a sufficient number of products, it is necessary to estimate the location of each frame in the design of the future greenhouse. After this, you can begin the creative process. If the dimensions of the frames are not the same, then they can be adjusted using sealant, polyurethane foam, and self-tapping screws.
Construction stages
Before you start construction work, it is necessary to consider the optimal location of the window frames so that during installation the greenhouse will be level and symmetrical. It is advisable to use frames of the same height, because this will simplify the preparatory work (there will be no need to adjust the dimensions).

Next you need to calculate the width of the greenhouse. To do this, you need to draw up a drawing of the future structure. When creating a drawing, do not forget to take into account the number of beds and their location. The standard width of beds in greenhouses is 100 centimeters, and the width of the passage is 50. The width between the beds should be selected so that a person can easily move between them with a small wheelbarrow.
Video - The simplest greenhouse made from window frames
Construction of the foundation
This process begins not with digging a pit, but with finding a suitable location.
When choosing a location for the foundation, you must adhere to the following requirements:
- protection from strong winds;
- good lighting of the area;
- lack of shading due to tall trees or buildings;
- location (it is desirable that the greenhouse be located from north to south).
Important! Soil also plays an important role when choosing a location. Wet or swampy soil will lead to subsidence of the building, so dense and dry soil is necessary for construction.
It’s great if there is a sand layer under the earthen layer. If it is missing, you can make a pillow for the foundation yourself. To do this, it is necessary to evenly cover the clay soil with a layer of gravel. After this, apply a layer of sand on top - no more than 20 centimeters. Before construction, it would be a good idea to check the location of groundwater. If they are located at a depth of one and a half meters or less, find another place to build the greenhouse.
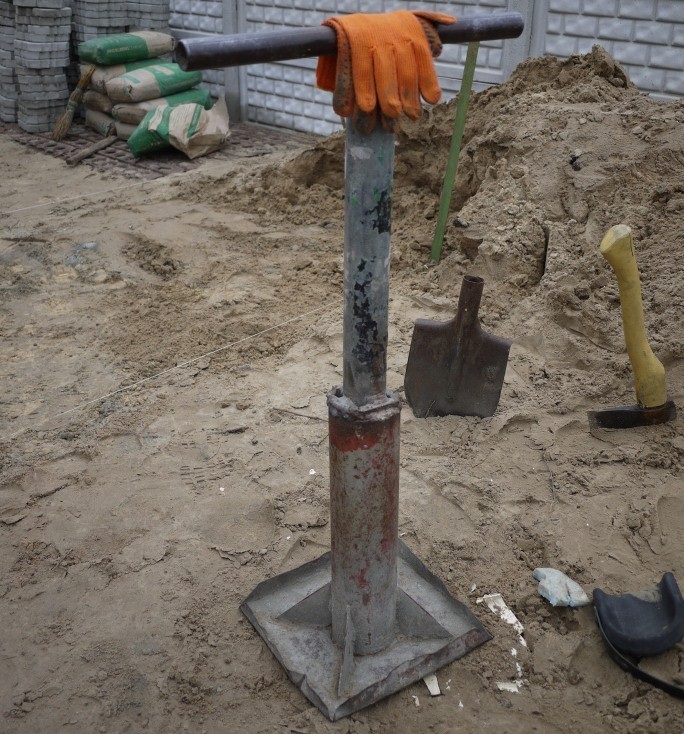
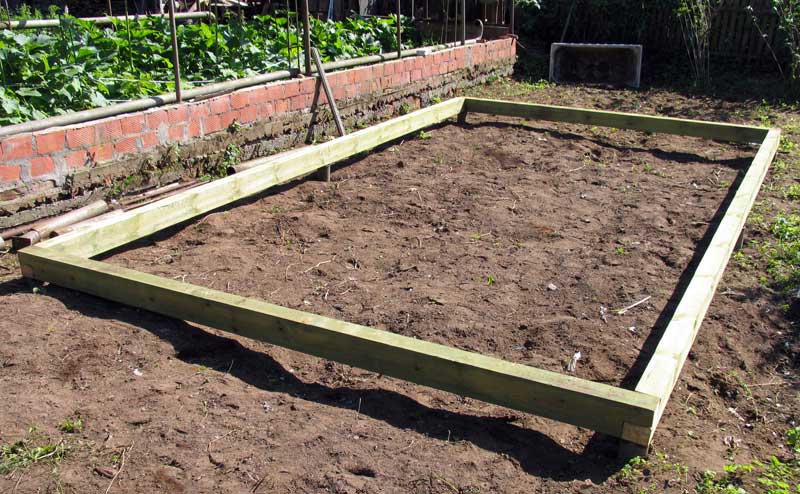
Step-by-step construction of a strip foundation
Step 1. Dig a shallow trench according to the drawing. Its depth should be about 40 centimeters.
Step 2. Make formwork. To do this, you need to place the boards along the edges of the dug trench, securing them with wooden pegs. You can also secure it using conventional electrodes bent in two. It is advisable to cover the boards with film so that they do not stick to the cement.
Step 3. If possible, install reinforcement along all dug channels. If there is no suitable wire, place large stones at the bottom of the trench.
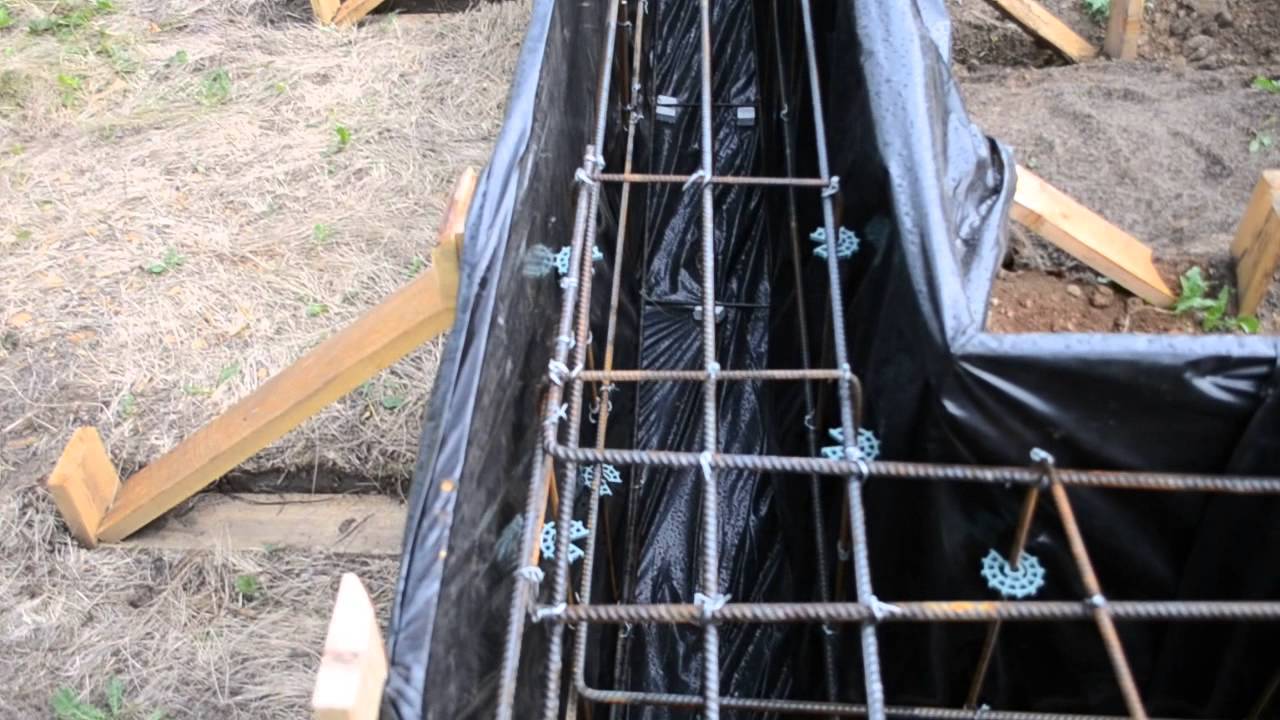
Step 4. Fill the trenches with prepared cement mortar, adding a little crushed stone to it. Make sure there are no voids in the foundation. The cement grade M-200 or M-300 is suitable for the solution.
Important! It will take you approximately 14-20 days to build a foundation for a greenhouse, so you need to calculate the time frame before starting work.
Step 5. After the cement has hardened, the formwork can be removed. Then, using roofing felt, perform waterproofing.
Step 6. If small cavities have formed along the edges, they need to be filled with wet sand and compacted well.
Tamper - tool

Construction of the foundation has been completed. Now all that remains is to wait two weeks until it dries completely.

Preparation of building material
Completing the preparatory work will strengthen the frame of the future greenhouse and facilitate further construction. It is likely that in the process of preparing the material you will have to remove some parts of the frames if they are broken or rotten.
To give unattractive window frames a “fresh” look, you need to:
- get rid of handles and hinges that you don’t need;
- remove old layers of paint; to do this, use a grinder or a regular scraper;
- treat the structure with an antiseptic (this will protect the wood from rot, mold or small pests);
- remove all glass for safety;
- fix the windows with tape or self-tapping screws.
It is necessary to prepare the window frames taking into account the fact that the height of the walls of the planned greenhouse will reach 1.7 meters.
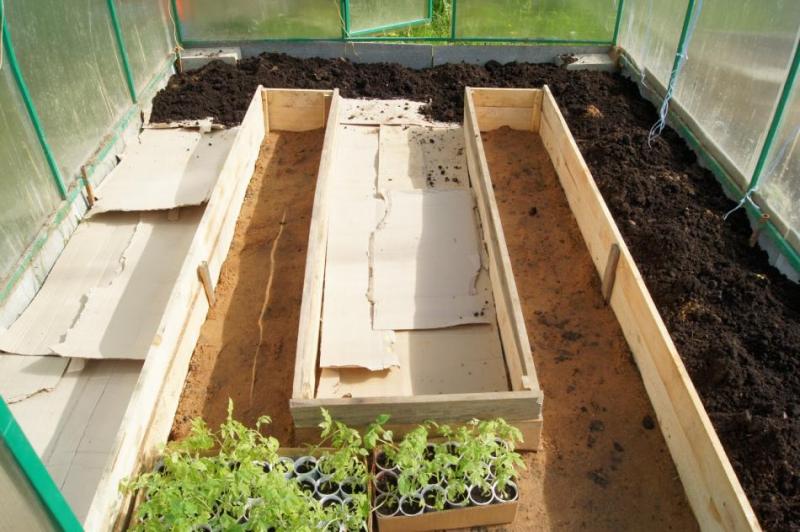
Flooring
Before laying the floor, it is necessary to resolve the drainage issue. Otherwise, there is a risk of water accumulating in the structure, which can lead to rot. To perform drainage, you need to dig a trench no more than 15 centimeters deep, then fill it with crushed stone or gravel. A dense layer of sand is applied on top of the gravel.
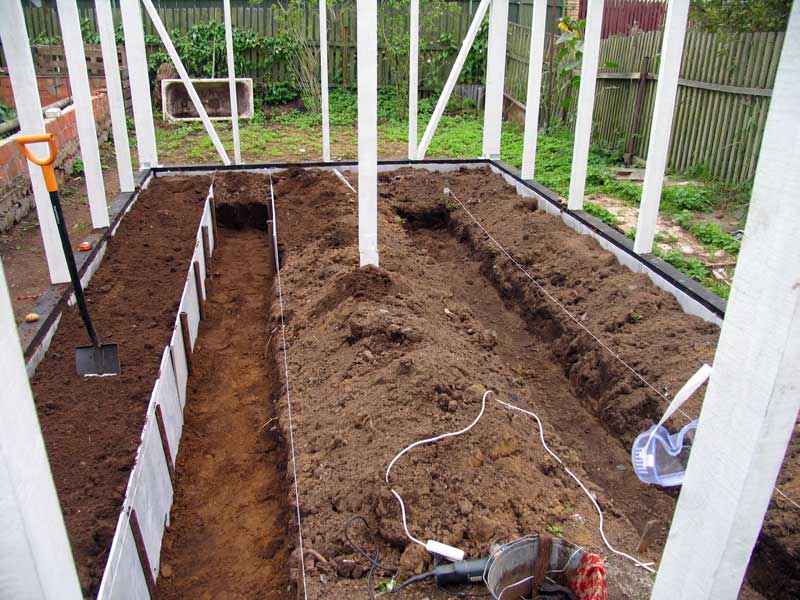
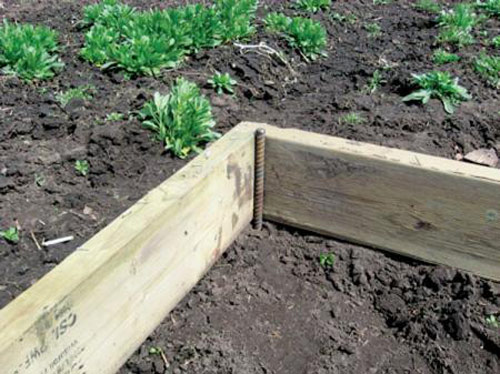
Careful and competent design of the interior space of the greenhouse will improve it appearance. When creating passages, it is advisable to fence them off with low plastic borders. This will prevent the fertile layer of soil from getting onto the path.
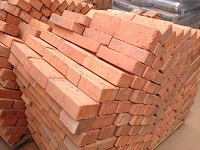
To decorate the floor of greenhouse paths, in addition to concrete, the following materials are used:
- sawdust;
- wooden boards;
- porcelain stoneware;
- brick.
This variety will allow you to design the inside of the greenhouse to suit every taste.
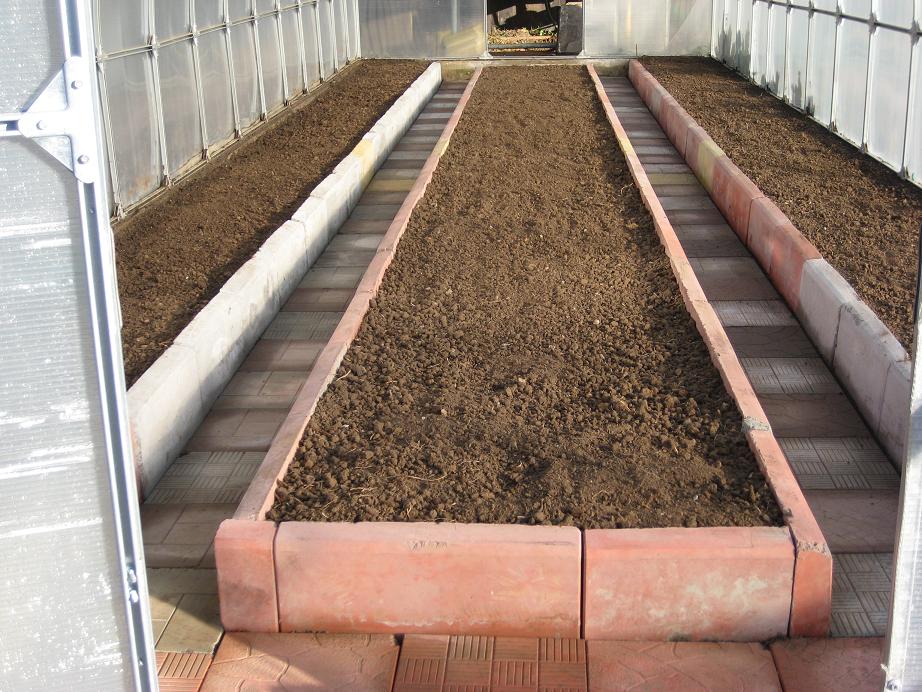
Porcelain stoneware paths in a greenhouse
Let's consider each material separately.
Table. Materials for design of greenhouse paths.
| Material | Advantages | Flaws |
|---|---|---|
| Excellent moisture absorption. Pleasant to the touch. Sawdust is a very cheap material. | It is difficult to move large items along sawdust paths. The material quickly spreads throughout the greenhouse. Needs regular cleaning. |
| A wide variety of shapes and shades, easy care. | Installation takes a lot of time. The material is quite fragile. High cost. |
| The material can last for a long time. Easy to install. | Additional treatment with antiseptic agents and varnish is required. The material is large, so when working with it additional difficulties arise. |
| The material is very strong and durable. Beautiful appearance of the finished path. Easy to install. | The bricks are quite heavy, so a special vehicle is needed for transportation. High cost compared to sawdust or timber. Only solid bricks will do; broken pieces will ruin the appearance of the greenhouse path. |
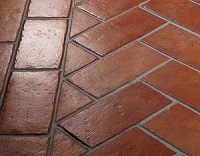
What exactly to use as the main material for laying the floor is up to you. After selection, the material is laid on a pre-prepared bed consisting of sand and gravel.
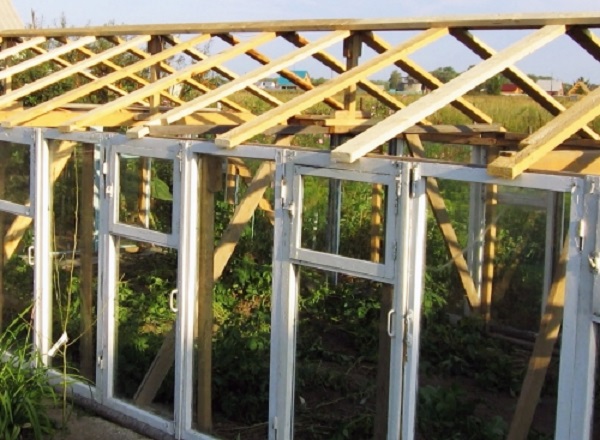
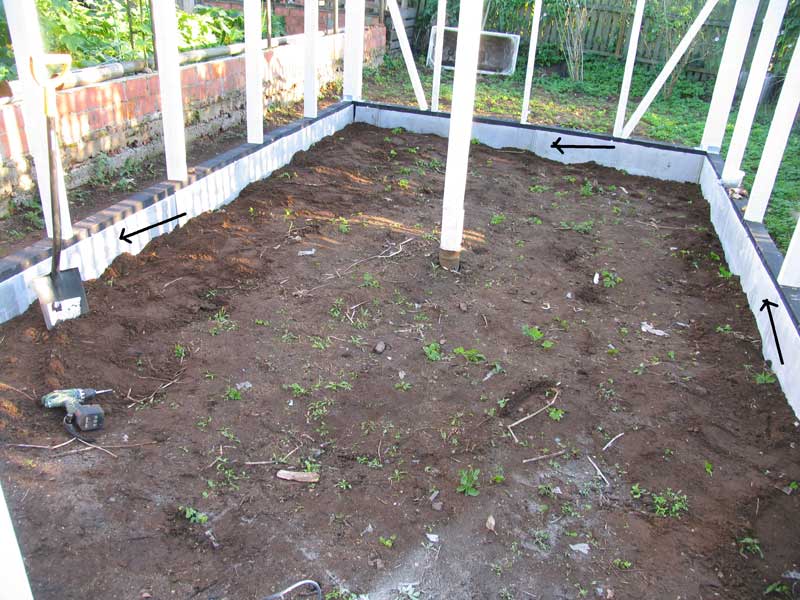
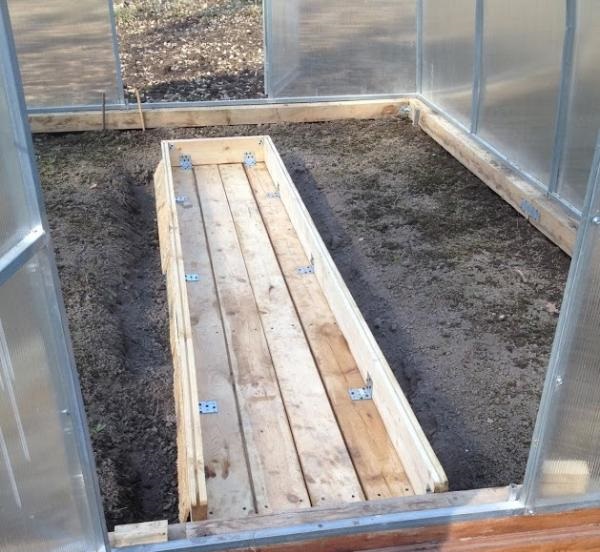
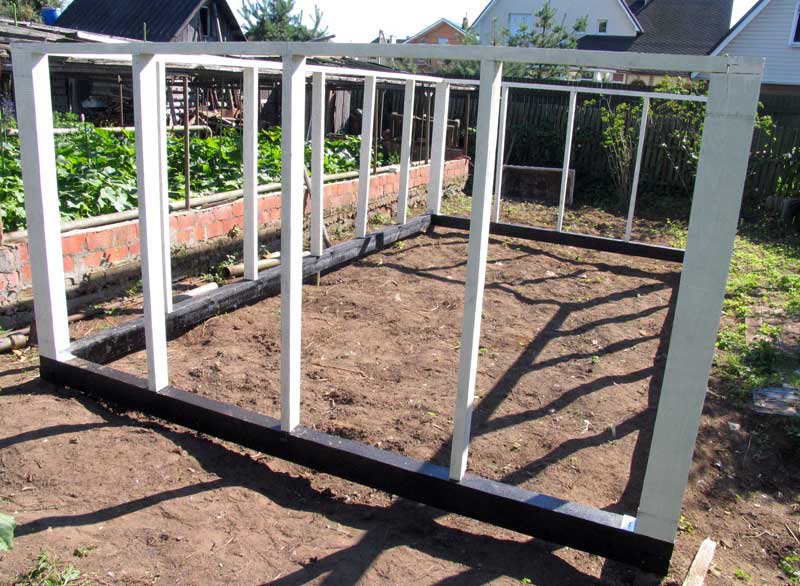
Construction of the frame
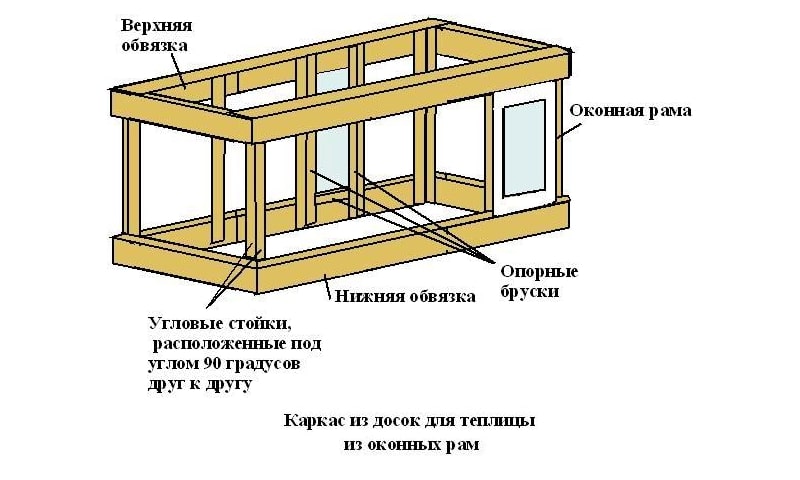
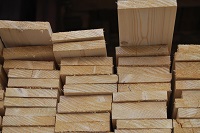
It is recommended to use boards for this purpose. This is an excellent material with a huge number of advantages. The thickness of the boards used should not exceed 5 centimeters. The harness is built from them (its upper and lower parts).

When creating the lower perimeter of the structure, it is advisable to lay two rows of boards - this will increase the height of the future greenhouse.
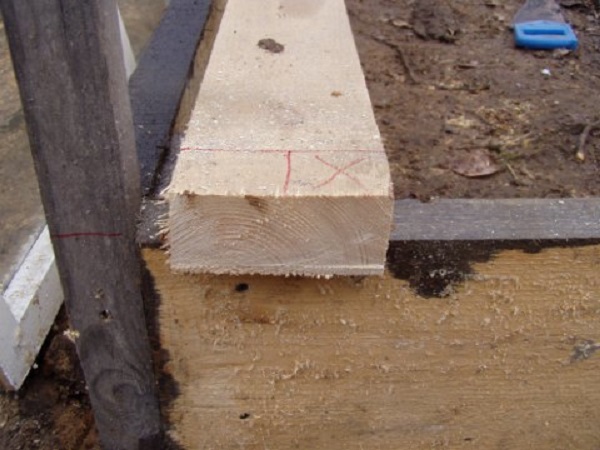
For vertical posts you also need to use 5 cm boards. Window frames located vertically to the ground are attached to them. Self-tapping screws are used for fixation. Polyurethane foam is suitable for treating gaps formed at the joints of structural elements. For reliability, you can strengthen the window frames from the inside using additionally installed support beams (their thickness can be less than 5 cm).
To make the structure more stable, you need to make vertical supports. They are fixed in cement mortar, and are attached to the racks using nails or self-tapping screws.
All holes and cracks formed during work must be treated with polyurethane foam. Pay special attention to this, since there should be no draft in the finished greenhouse. The only entrance for the outside wind is the vents that you left for ventilation.
![]()
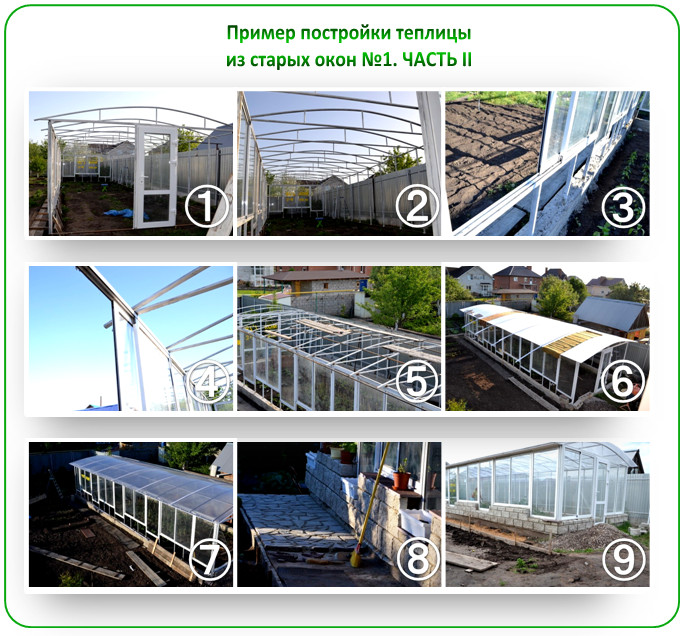
Erection of the roof
Initially, you need to decide what type of roof you prefer - gable or single-pitch. It is worth noting that to erect a gable roof you will need much more prepared parts.

This type is considered the most suitable for all types of structures. Moreover, the material for the roof does not play a big role. Installation of a gable roof is quite simple: nail the frame blanks and cover them on top with a plastic or wooden ridge. At the same time, watch for the appearance of cracks. They will provoke the formation of an unhealthy microclimate inside the constructed greenhouse, so they all need to be sealed. The coating material used is polycarbonate or greenhouse film. Glass is the leader in quality and properties, but it is very expensive. In addition, during installation you can easily break everything.


If you do not have enough material to build a roof, you can choose a lean-to type. The procedure is practically no different from the previous one, with the exception of one thing - the roof will not rise in the center, but only on one side.
The construction of a greenhouse does not require large investments; for this you just need to approach the matter wisely. And you will definitely succeed!

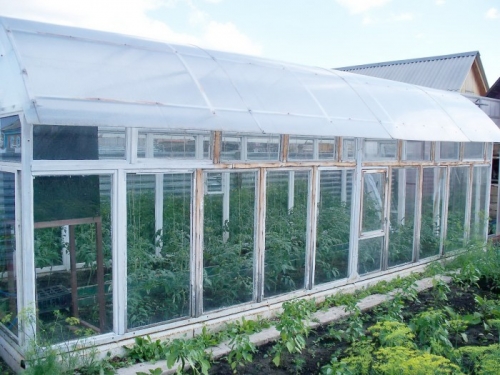
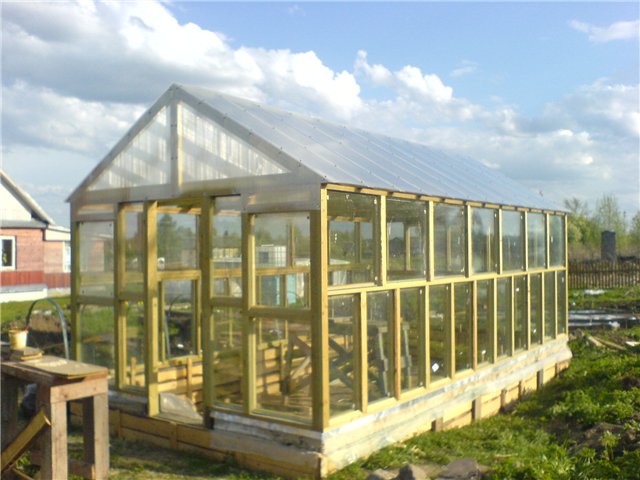
Greenhouse made of window frames and polycarbonate
Below is another option for building a greenhouse from old wooden windows.
Greenhouse from PVC pipes with your own hands
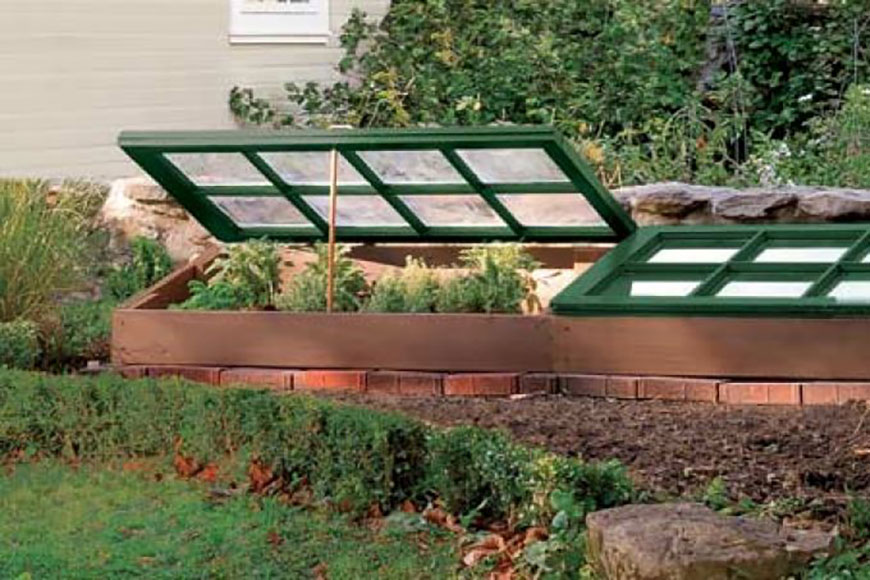
Construction of a mini-greenhouse
Having completed the construction of a “frame” greenhouse, you can practice a little by creating a mini version.
Preparatory stage
If, when creating a regular greenhouse, you use window frames as walls, then for mini-greenhouses the frame plays the role of a roof. Wooden planks are used to construct the walls. During the day, the roof opens to ventilate the planted plants. When calculating the size of the future building, take into account the width of the window frame. It must match the dimensions of the greenhouse. The shape of a mini-greenhouse is usually made in the form of a rectangle rather than a square. To do this, the roof is laid out from several windows.

To build the frame, you will need boards. For racks, use wooden beams (4 pieces). Dig prepared beams in the corners, and special shields need to be built from the boards. The height of the shields should be different so that precipitation can roll off the sloping roof. To do this, nail one more board on one side than on the other. Make sure that the roof fits tightly against the panels. Trim off the excess edge of the board. Secure the boards to the beams with nails.

Erection of the roof
The assembly procedure for a mini-greenhouse is simple, so there is no need to remove the glass from the window frames.
You can begin installing the roof right away.
Step 1. Position the window frames perpendicular to the long side of the greenhouse.
Step 2. Secure them to a high wall using window hinges.
Step 3. There is no need to connect the frames together. This will allow you to ventilate the greenhouse by opening one part of the roof. All parts of the roof must fit tightly to each other.
Step 4. Screw special handles to each frame so that they (the frames) can be easily opened.
Step 5. Install the clamp on the short shield.
Step 6. Cut a special strip that you will use to support the open frame.
At this point, the construction of the mini-greenhouse is completed. You can plant seedlings there and pamper your family with fresh vegetables.
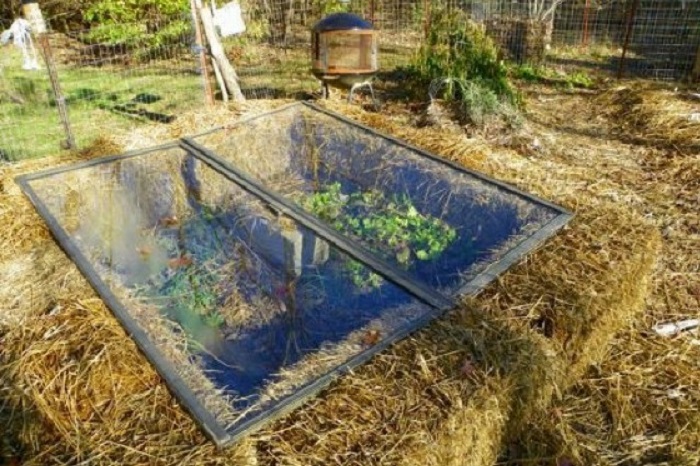
Frame made from old windows and straw bales. Manure or compost is placed at the bottom under a layer of fertile soil, this will help retain heat.
Video - The simplest mini-greenhouse made from window frames
How to make a greenhouse with your own hands from old window frames?
The wisdom of having a greenhouse for vegetables on the site is clear to many. The short summer season is sometimes accompanied by cool weather and prolonged rains. However, the desire to receive good harvest, regardless of climatic conditions, remains the same for all summer residents. In addition, the effort you expend on caring for plants must be justified by an effective result. A properly organized greenhouse is able to accumulate heat and maintain the desired microclimate inside the space.
Some people turn to specialists in this matter to create a greenhouse, others boldly get down to business and build the structure with their own hands. When performing work independently, other technologies are also used. However, such a greenhouse made from old frames is considered the most simple option, it is quite simple to build. Due to its properties, glass is better suited than film for a greenhouse with vegetable crops. It not only allows the sun's rays to better penetrate the greenhouse, but also keeps it inside longer.
Important points during construction
Let's look at some details that are important to know in order to build a greenhouse from old wooden beams correctly:
- In addition to a suitable location for construction on summer cottage, the dimensions of the greenhouse also determine the size of the existing old window frames;
- If you need a reliable structure that is designed for long-term operation, it is better to make the greenhouse frame permanent. An excellent option for creating solid foundation, will become brickwork. The roof for the greenhouse can be made as a separate removable element, which is dismantled during winter and snow loads. If the brick version for the frame does not suit you, you can build a base using boards;
- When building a greenhouse from unnecessary old windows, the upper part of the frame can be made with one or two slopes. To tilt the roof in both directions, you must first lay a ridge beam in the middle. If a lean-to greenhouse is planned, its location should allow for maximum sun exposure during the day. This condition will have a beneficial effect on the condition of the plants;
- If there are a lot of old windows, it is better to make the entire frame entirely from them, because such greenhouses from frames let in much more light, promoting the active development of vegetable crops during the growth period. However, you need to be careful not to damage the integrity of the mounted glass in the side;
- Do not forget that your structure must be airtight. In addition to the fact that assembling a greenhouse from window frames requires care and precision, you also need to take care to eliminate gaps between the elements. You can fill the seams yourself using sealants and special putties. The better the space is isolated from the inside, the better for the plants;
- Provide several supports that can support window frames while you need to work in the greenhouse, caring for vegetable crops;
- Choose a place for a greenhouse made from old window elements that is as windless as possible. It is desirable that a water supply be provided to the building for convenient watering. Great option– build a greenhouse, connecting it with another existing capital structure;
- If the frame is made of wood, take care to protect the structure from rotting. Before installing the frame, you must first distribute roofing felt around the perimeter, and impregnate the lower part of the supporting structure of boards with resin. If these measures are observed, the base of the greenhouse made of window elements will last a long time;
- In order for the service life of a greenhouse made from old wooden beams to be impressive, it is better to build a brick base to support the frame.
Consistent actions during the construction of a structure
Preparatory stage:
- Measure all the window frames you have. Most often, the elements of old frames differ from each other in size;
- Knowing the dimensions, you can understand which option for distributing elements along the frame is the most optimal. If all the elements for the greenhouse are the same, the difficulties in their distribution will be minimal;
- Record your decision after the calculations in the drawing, at least schematically. This way, you don't have to do the same work several times, remembering the final version. Record on the drawing front door and places allocated for beds, mark the distances between them. Don't forget to make handles later. Most often the passage is 800-1000 mm.
Determining the optimal location
You need to be very careful when choosing a location, since proper placement of a greenhouse on a site is one of the main components of a successful harvest. In order for the sun to warm the soil of the greenhouse from the window frames for as long as possible, choose an area near which there will be no tall bushes and trees. It is also advisable to move away from buildings on the site that cast an impressive shadow. The area under the greenhouse must be protected from drafts caused by the wind.
The plot of land for the greenhouse must be level. The reference point for placing the structure is from north to south. Choose loose soil for installing a greenhouse that you assembled yourself. Avoid proximity to groundwater when placing the structure; it is better that the soil is moderately dry.
We install the base with our own hands
It is quite simple to build a foundation for a greenhouse from old frames, since this structure does not create much pressure on the base. The foundation can be strip; for this, a depression is made in the ground around the perimeter of the greenhouse and filled with concrete mixture. The base is also made of brick and wood. Brick and concrete options are more durable.
There is a base made of metal; it is also used for the frame of the greenhouse from window elements. Such a foundation is mounted strictly under the support pillars.
The main requirement when organizing the foundation for a greenhouse from window frames with your own hands is compliance with the level. Monitor this parameter with a special device.
Preparing window frames
This stage involves dismantling unnecessary parts from frame elements: fasteners, hinges, window handles, etc. Next, sand the surface of the frames, removing the old layer of paint. If these conditions are met, the new paint will be distributed evenly and form a reliable protective layer that prevents the process of rotting. Additional treatment of wood against rodents will not be an unnecessary undertaking.
We mount the frame with our own hands
Before installing wooden window frames, it is necessary to build a frame for the future greenhouse. Its construction is not particularly difficult; you must be guided by the dimensions of the drawing when preparing bars of the required size. The elements are assembled together using special screws and nails.

Fastening elements to the frame structure
In order for the structure to be stable and last for many years, it is better to install the frames using screws and self-tapping screws. These fasteners are no more reliable than nails, however, they can reduce the likelihood of glass damage. We seal the space between the elements with sealants or foam, depending on the size of the gaps. Thus, the greenhouse will comply with necessary conditions tightness of space.
Roof structure
The best option is considered to be a gable roof with a ridge beam arranged along the greenhouse. This way you will properly organize the removal of rain and melt water into the drain. It is better not to use the material for the greenhouse roof; choose a lighter material. An excellent solution would be a polycarbonate roof; its cost per square meter of the upper part of the greenhouse structure is quite acceptable.
Quite often, greenhouses made of glass frames are built in suburban areas. This method of creating a structure is very simple and notable for its cost-effectiveness.
Advantages of a greenhouse made from window frames
For many years, greenhouses that are manufactured have been very popular.
They have the following properties:
- Cost-effective, since you don’t have to spend money on building material. Frames can be your own or purchased.
If you do the math, this method of making a greenhouse will be several times cheaper than a new project. - Practical. Frames, as a rule, are already coated with paint and are thereby reliably protected from the effects of external weather and climatic conditions.
They are also not affected by moisture that is inside the structure.
Advice.
If there are practically no layers of paint left on the window frame, then you can update them without much difficulty. To do this, the old paint is removed, the surface of the wood is treated with sandpaper and only then covered with the product again.
- Eco-friendly, since wood is an environmentally friendly material and is not capable of adversely affecting plants and the environment.
- Durable. This indicator depends on what type of wood the frame is made of.
As a rule, the service life is about 5 years. But, this is provided that the surface of the material is reliably protected by a layer of paint or varnish. - Heat-intensive. The glass that is already in the frames reliably retains heat inside the structure and allows the sun's rays to penetrate inside without any problems.
Thus, the structure warms up naturally, savings on heating. - Well lit. Thanks to their high light transmittance, glass helps provide the same daylight hours as outside. They do not dim it and it is also possible to save on lighting.
Advice. There are plants that do not like the burning rays of the sun.
They get burns from them, which prevent the culture from developing normally. In order to protect such plants, special tinting films are used, which are glued to the surface of the glass from the inside.
- Durable.
The structure of the wood from which window frames are made goes through a long process of drying and subsequent treatment with special means. Thanks to this, the strength of the wood increases, and the frames can withstand quite significant loads.
Advice. If there is no glass in the frames, then you can use ordinary polyethylene film instead, which today has a wide range and is not inferior in properties to glass. The use of cellular polycarbonate is also practiced, see photo.
Stages of building greenhouses from window frames
How to build a greenhouse from frames?
Initially you will need:
- Select a location for greenhouse construction.
- Draw up a project for the future structure.
- Calculate the required amount of materials for its construction.
- Prepare materials for use.
- Consider the basis for the structure.
Choosing a location for a greenhouse in a suburban area
In order for plants to develop in a greenhouse, it is necessary to create all conditions for them not only inside the structure, but also outside.
The choice of location for a greenhouse is based on:
- The area for the greenhouse should be open without tall plants.
- Nearby there should be all communications that are necessary for the normal maintenance of the structure: water and light.
- There should be no septic tanks or other wastewater facilities nearby.
Drawing up greenhouse projects
This process needs to be taken very seriously.
This takes into account:
- The size of the free area on the site.
- The amount of ready-made building material.
- Necessary design parameters.
Advice. The shape and size of the greenhouse are mainly based only on the free area of the suburban area. Lighting, if necessary, and water should be provided to the greenhouse. It should also be freely accessible.
The greenhouse can be of this shape:
- Square.
- Rectangular.
Note. Round structures of this type are rare, since they are not simple in their construction, and it is impossible to build this type of greenhouse from window frames.
The roof can be:
- Single-pitch.
- Gable.
- Broken line.
Advice. The choice of roof for a greenhouse should be based on the angle of the sun's rays in the area so that the roof can protect the plants from getting burned.
All this is taken into account and a design project is drawn up.
Counting materials for making a greenhouse
Before making a greenhouse from frames, the required amount of material is initially calculated, thanks to the project, based only on the design parameters.
So:
- The finished frames for the greenhouse are immediately measured.
- Then the measurements are compared with the existing project.
- Calculate their required number.
- If there is not enough material, then they buy more or make it themselves (frames).
Advice. If it is not possible to make full glazing in the greenhouse, then you can use film.
Only it can be either on the roof of the structure, since it does not have much weight, or in the missing cells of the window frame. Some people remove the glass and completely cover the structure with plastic film.
Conclusion: thanks to the completed project, it is possible to draw up an estimate for the construction of the greenhouse structure.
Procurement of material for the construction of a greenhouse
On a suburban area, a do-it-yourself greenhouse from frames can be installed quickly and easily if the material for such work is well prepared.
So:
- If there are ready-made window frames, then they need to be checked for strength and wear. They should not have visible or rather large defects.
- The paint on the frames that has come off is removed, and the surface of the wood is treated with antiseptics.
- After this, to protect the surface of the material, you can coat it with paint or varnish.
Advice. Such work is carried out from both sides, since there will be high air humidity in the structure from the inside, and climatic and weather conditions will affect the surface of the wood from the outside.
- Next, all the glass in the frames is checked for integrity. If they are not there, then after assembling the frame you can install them or use film.
Advice. If there are not enough ready-made frames for the greenhouse and there is no way to purchase them from anyone, then you need to make them yourself.
- It is not necessary to manufacture frames for a greenhouse exactly like the analogue.
- It will be enough to make them the same size.
- Only here it is worth considering the material for covering the frames.
- If the choice is on film, then there will be no problems with attaching it to the tree.
- If glass is used, then you need to make recesses on the frames for its installation.
Advice. The thickness of the wood for homemade frames should correspond to the thickness of ready-made frame structures.
Choosing a base for a frame greenhouse construction
The manufacture of a greenhouse from frames is characterized by the use of several types of foundation.
So:
- First of all, a wooden base is used. It is made from thick boards.
You can also use parallel bars and other wooden sticks. Most importantly, they must be durable. - The second most popular is concrete foundation. Initially, for its production, formwork is made from wooden boards.
Then a concrete solution of sand, cement and water is mixed in proportions of 3 to 1 (sand/cement). This solution is poured into the formwork and you need to give it time to dry. Generally, it will take about 15-20 days. - The third type of foundation is a brick foundation. It is made of bricks, which are fastened together with concrete mortar.
The first layer is dug halfway into the ground so that it can be fixed to it.
Advice. If there are no bricks, then foam blocks are used, which are also durable and resistant to weather conditions.
The process of making a greenhouse from frames
To make a greenhouse from frames you will need:
- Tape measure and pencil.
- Jigsaw.
- Construction level.
- Self-tapping screws and dowels with large legs.
- Screwdriver.
- Hammer.
- Hammer and other available tools.
In the video you can see the whole process of constructing a greenhouse yourself from window frames.
Advice. Most importantly, it is necessary to securely secure the frame frame at the base. If the greenhouse is large, then the structure is strengthened using supports that are inserted in the center of the frame and deepened into the ground.
Such supports can be:
- Made of metal - in the form of metal pipes.
- Made of wood - in the form of beams and planks of great thickness.
Greenhouse covering made from window frames
You can make it yourself quickly and easily. You also need to choose for her best option coating if it is not possible to leave the glass.
So:
- The main options are polyethylene film and polycarbonate.
- When choosing them, you should focus on the quality and strength of the window frames.
Advice. If the frames are new and no deformations are visible on them, then polycarbonate can be used. If the frames are quite old and have been in use for a long period, then it is recommended to use plastic film.
- The main difference between such materials is the price.
- It is several times lower for polyethylene film than for polycarbonate.
- Only here it is worth considering that the service life of polycarbonate is longer than that of simple polyethylene film.
Advice. For this reason, it is necessary to choose reinforced polyethylene film, which is not inferior to polycarbonate in practicality and durability.
There are also the following types of film:
- Light-repellent - used for those crops in the greenhouse that do not like the sun's rays.
- Multilayer - used so that the greenhouse can be used in the cold season.
- With a protective coating - used to protect plants from scorching sun rays.
Only cellular polycarbonate is used for greenhouses, which has:
- Light weight.
- Practicality.
- Heat capacity.
- Durability.
- Moisture resistance.
There are special instructions for attaching it to any surface.
For work you will need:
- Screwdriver.
- Riveter.
- Hammer.
- Rubber dowels.
- Handy tool.
Polycarbonate can also be mounted using construction adhesive or special adhesive tape. Thus, if necessary, it is possible to dismantle the material.